For Redtail Integration when using Google Calendar or Microsoft Outlook / Office 365 / Exchange as your primary calendar, Click Here.
If you are a financial advisor who uses Redtail as your CRM, we have great news! GReminders integrates directly with Redtail to allow you to:
- Send Reminders to contacts in Redtail when you schedule activities in Redtail
- Writeback Reminders as Notes or Tasks in Redtail
- Add new contacts in Redtail when using GReminders automated online scheduling
- Create Activity Types in Redtail when using automated online scheduling.
- Map Answers to Questions asked during Scheduling to Redtail UDFs
Contents
- Setting up Your Trial
- General Settings
- Inviting Users
- Integration Setup
- Control Who Receives Reminders
- Manage Calendars
- Personal Reminders
- Setting Up Automated Scheduling
- Cancelled Appointment Options
- Setting up Client Reminders
- Confirming Event Details
Setup Your Free Trial of GReminders
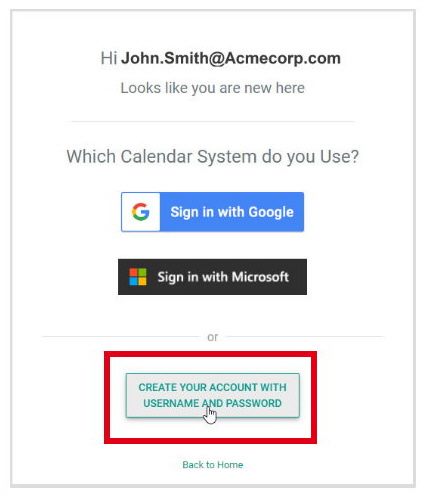
If you use Redtail’s calendar for scheduling meetings, you will want to setup GReminders using a username and password.
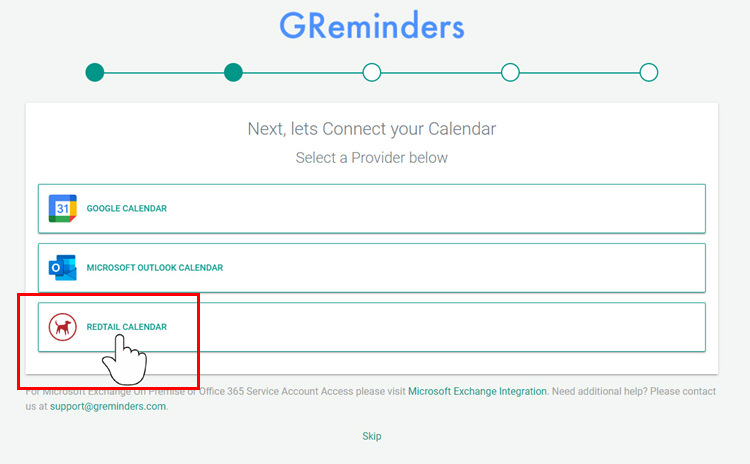
A few steps later, you’ll be asked to connect your calendar. Select Redtail.
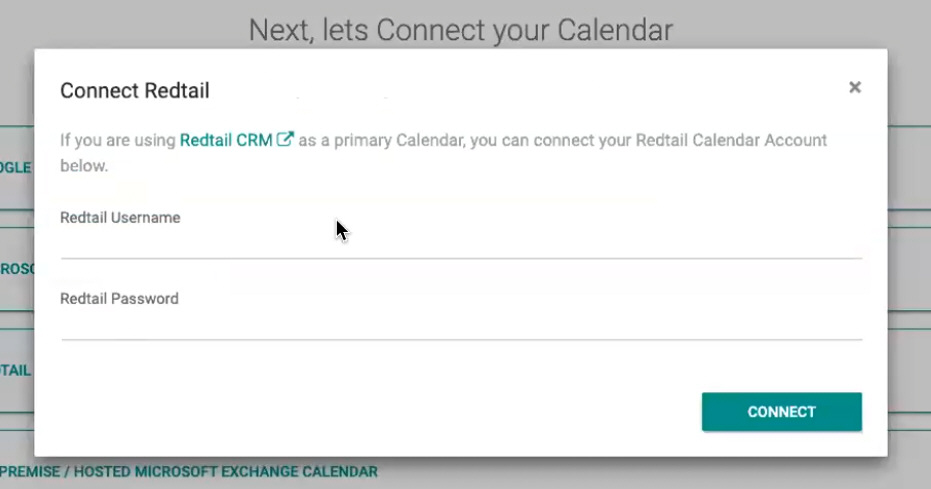
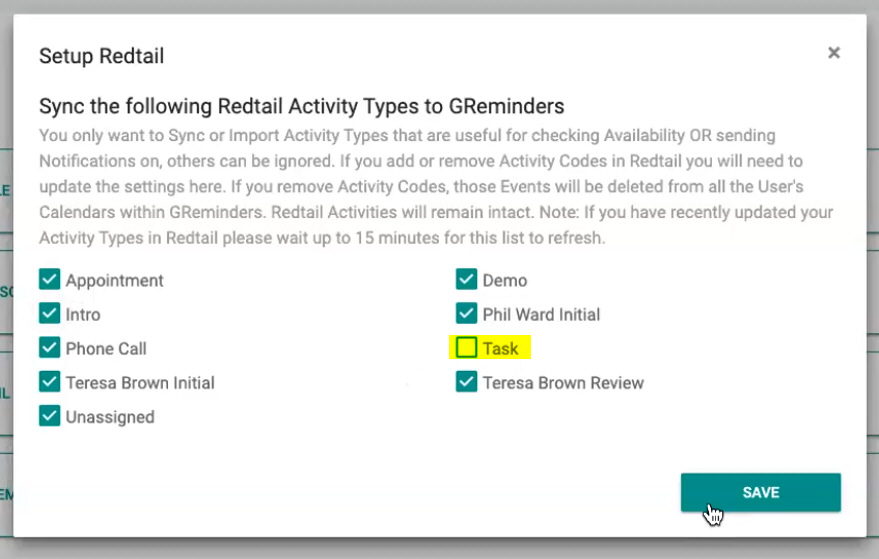
Then enter your Redtail Credentials:
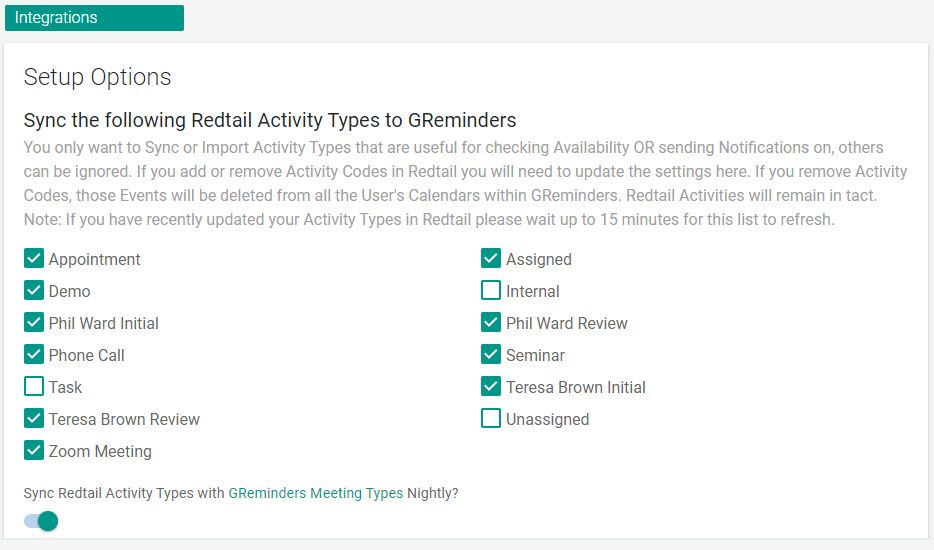
Next, uncheck any activity types you do not want to block your team’s availability. Tasks are typically unchecked, but your office may have other activities that they use but would not want them to block their schedule.
If you need to make changes to this later, you can do so under Org Settings > Integrations > Redtail CRM > Setup Options
Set up at the Organization Level
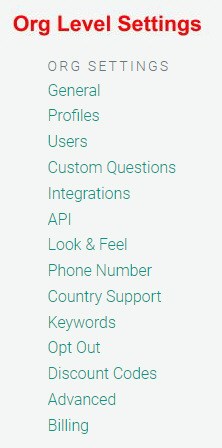
The main menu on the left hand side of the GReminders app is divided into three sections, the upper menu options are used to setup the application at the User Level, the middle section is for template management and reports, and the items on the bottom of the menu (shown above) will affect your entire organization. As an administrator, you may wish to take organizational control over some of the options offered at the user level, this will be noted below.
We’ll begin by setting up at the Organization Level. We won’t discuss every menu item here, just those that are the most important when you integrate with Redtail. We’ll discuss setting up Reminder Templates last.
General Settings
To ensure that each user in your Organization adheres to the setup that may be required by your compliance department, under General, select “Override User Notification Settings”.
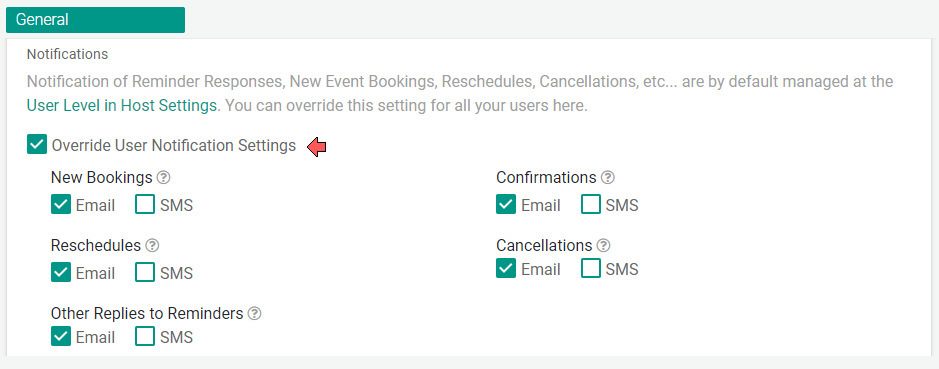
When clients respond to your SMS or Email reminders, you will receive notifications of the responses. Some compliance departments require all responses to be sent through the firm’s approved email provider. If your compliance department requires the same, simply uncheck SMS notifications next to each type of notification (shown above). You will now receive all responses from clients via email, regardless of how they were sent by the client.
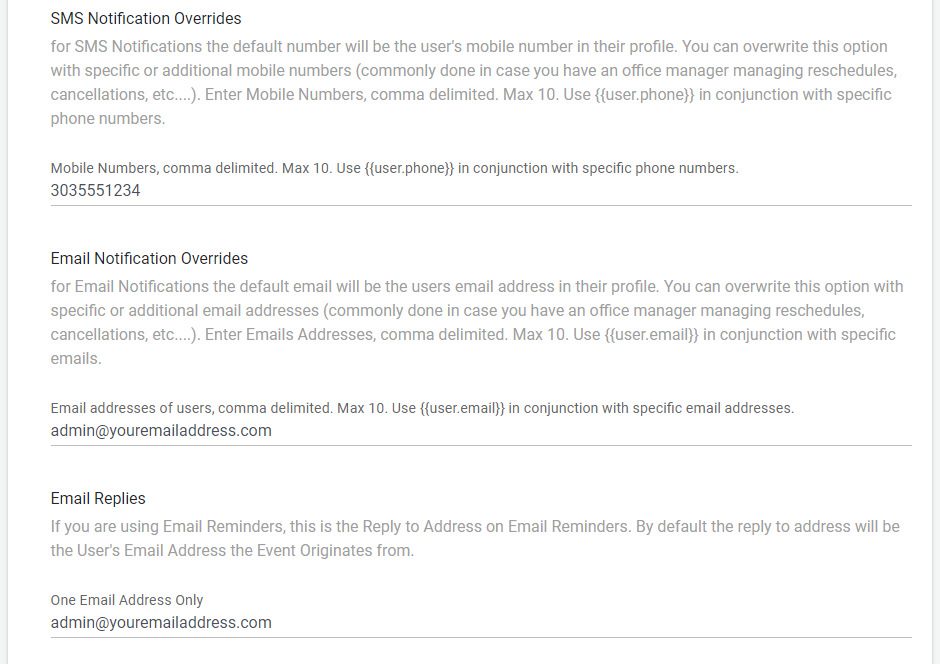
You can then decide if you would like each user to receive an email when a client responds or if you would like the responses to go to an admin email address…or both.
Profiles
You can assign each member of your team to a profile and create as many profiles as necessary. Profiles are used to grant access to Reminder and Event templates you create and permission to access specific integrations. You can learn more about how profiles work and how to set them up, Here.
Users
To invite users to join your account, choose Users from the main menu. Include their email address, select their profile, and send.
When you set up Managed Event Type Templates and Reminder Templates and assign them to a profile, those templates will be ready to use the moment a new user signs into GReminders for the first time.
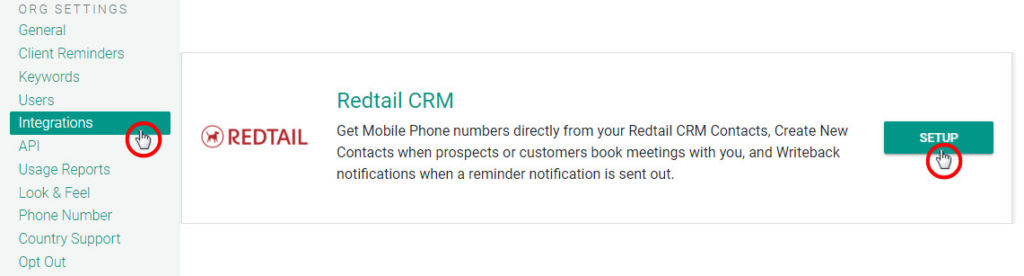
Integrations
Under Integrations, scroll down to Redtail and select Setup.
If you did not connect your Redtail Calendar when you signed up for the trial, you will need to complete the integration now by entering your Redtail Username and Password.
If you connected your calendar when you began your trial, the integration with Redtail CRM was setup automatically and you may wish to confirm your Redtail integration options.
The first options you’ll see after integrating GReminders with Redtail are Redtail Activity Types. To understand which types to select and which to leave unchecked, refer to this ARTICLE.
Next, choose options which determines how GReminders and Retail will communicate:
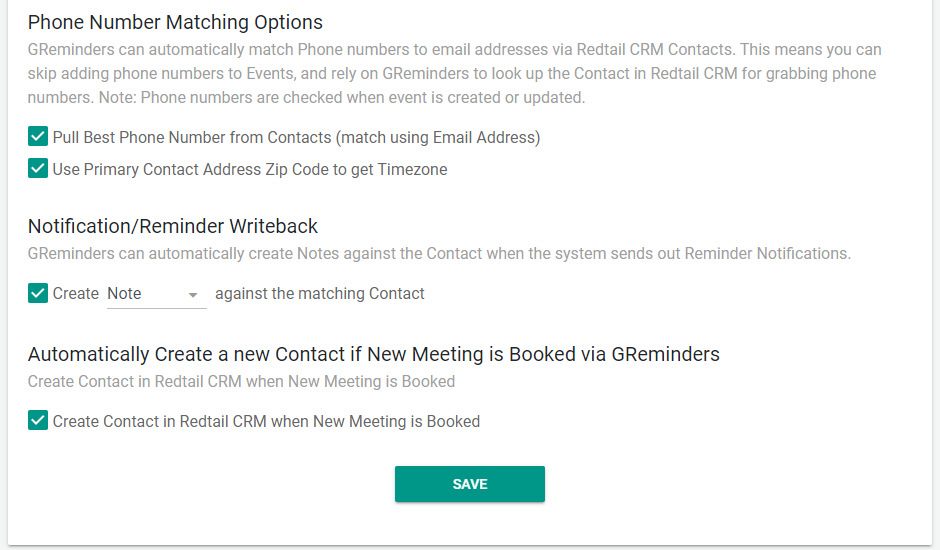
Pull Best Phone Number from Contacts
Pull Best Phone Number from Contacts option allows GReminders to import your Redtail contact’s first and last name and phone number, when an activity is scheduled with the contact.
Use Primary Contact Address Zip Code to get Timezone
If you conduct remote meetings with clients using Zoom, Google Meet, GoToMeeting or other online meeting applications, you will want your clients to receive their reminders based on their time zone. By checking this option, our system will automatically determine their time zone based on the zip code of their mailing address in Redtail. You can read more about this option, here.
Create Note/Task against the matching Contact
When you select Create Note Against Matching Contact, a copy of the reminders your clients receive will be added to latest notes under the matching contact (below). You can also set this option so that it creates a task instead of a note.
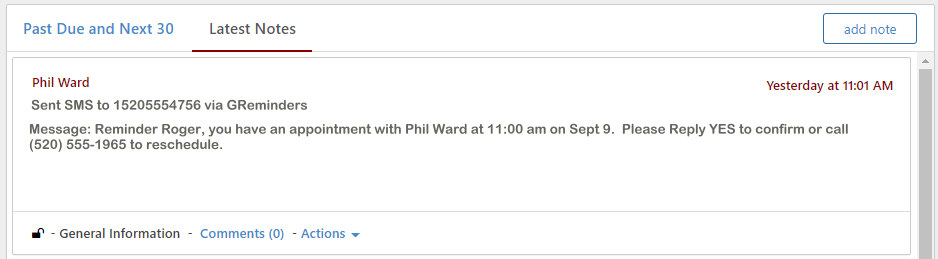
In addition, all reminders are logged by date and time in Usage Reports>Delivery>Log.
Create Contact in Redtail CRM when New Meeting is Booked
If you will be using GReminders automated scheduling, checking this option in any GReminders Event Type or Event Type Template will create a contact in Redtail when a new client schedules a meeting with an advisor. Automated scheduling is set up under the User Level (Event Types) or at the Managed Level (Managed Event Type Templates) for groups of Users, assigned via Profiles.
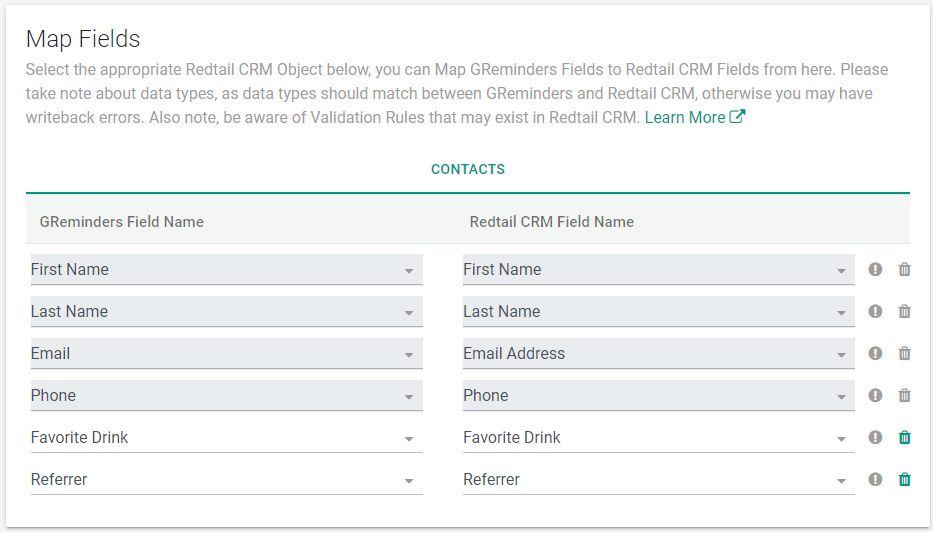
Map Fields
After setting up Custom Questions which can be used in Event Routing or Event Types, you can map the answers to those questions to Redtail CRM. Most answers will be mapped to UDFs in Redtail.
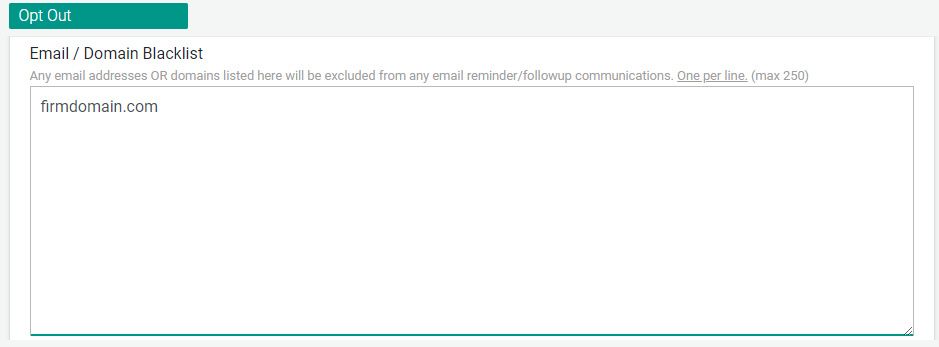
Opt Out
To be sure that none of your colleagues who may be invited as attendees to meetings receive a client reminder, add your company domain to the Opt Out Email list:
Security
Under Security options, you can determine how long you wish GReminders to retain your event data on our servers. To learn more, read this short article. You can also set how often you would like to force a password reset.
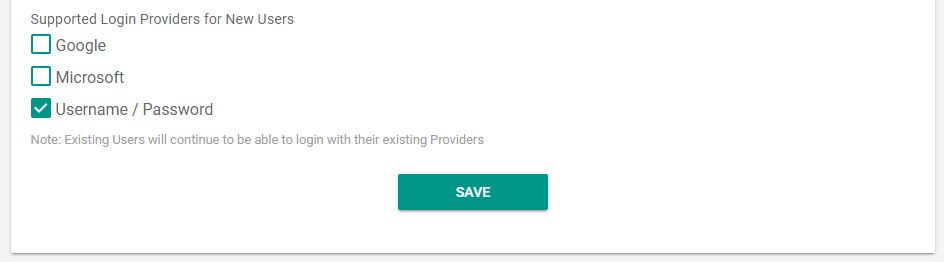
Finally, uncheck Google and Microsoft and check Username/Password as the Supported login Providers for New Users.
Setup at the Management Level
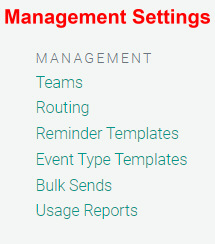
The Management settings allow you to set up Teams, Event Routing, Managed Reminder Templates, Managed Event Type Templates, Bulk Sends, and access Usage Reports.
A detailed description on setting up Reminder and Event Type Templates can be found below, under User Settings.
You can assign profiles various levels of access to Management features or block access entirely.
Setup at the User Level
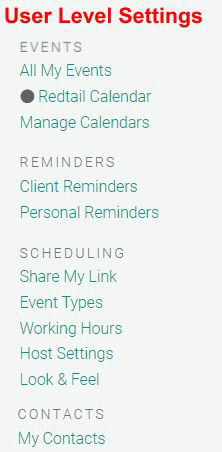
Each standard user on your account will have access to the menu above, provided you have granted them access under profile settings. The User Level Settings will affect the individual user only and not the entire organization.
Manage Calendars
Select Manage Calendars to indicate your primary calendar and connect any other calendars you might use which could impact your availability while using GReminders automated scheduling.
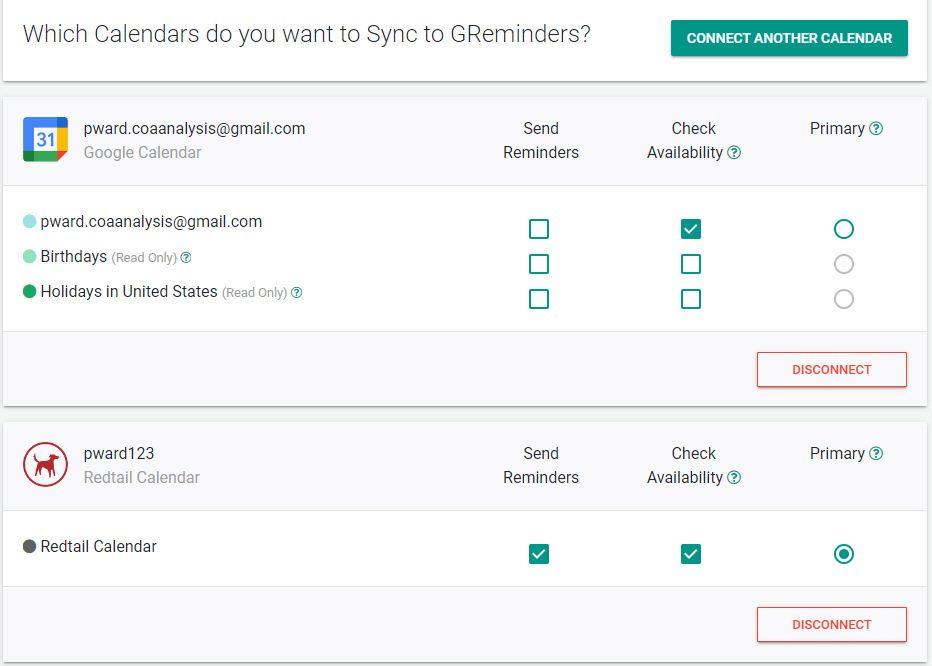
In the example above, Redtail is the primary calendar used for scheduling, checking availability, and our system will only send reminders for events on the Redtail calendar. Because Redtail is primary, it is also the calendar where team events will be scheduled. This user keeps personal appointments on his Google calendar, so it has been connected so our system can check availability against the calendar, but no reminders will be sent to events scheduled on it.
To avoid duplication of events, your Google or Microsoft calendar should not be synced to Redtail using the Retriever Cloud app (in Redtail) when you have a direct integration between GReminders and Redtail.
Note: If you will not be sending reminders on your account, uncheck the Send Reminders/Check Availability options.
Personal Reminders
Each user may utilize personal reminders to send themself or a colleague reminders of upcoming events. Personal reminders are set up like client reminders and have all the built-in options.
Event Types
You may allow users to setup their own Event Types in addition to Managed Event Type Templates you set up under the Management Menu.
When setting up Event Types, there are a several important settings you’ll want to pay close attention to:
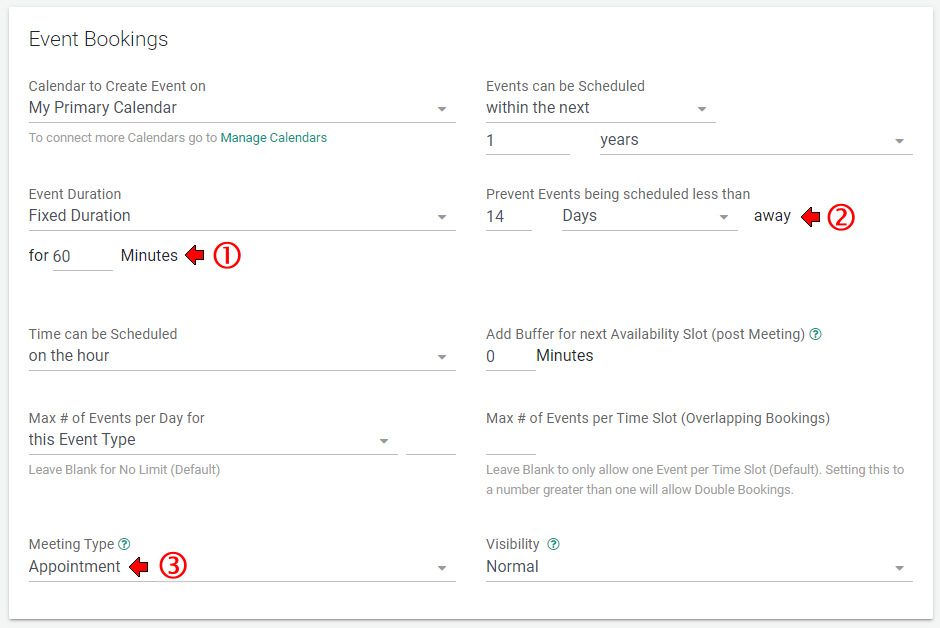
- Make sure your Event Duration matches any time you may have included in your Title or Description.
- Prevent clients from scheduling events earlier than you have time to prepare for the meeting.
- Select a Meeting Type in Redtail to associate with this event type.
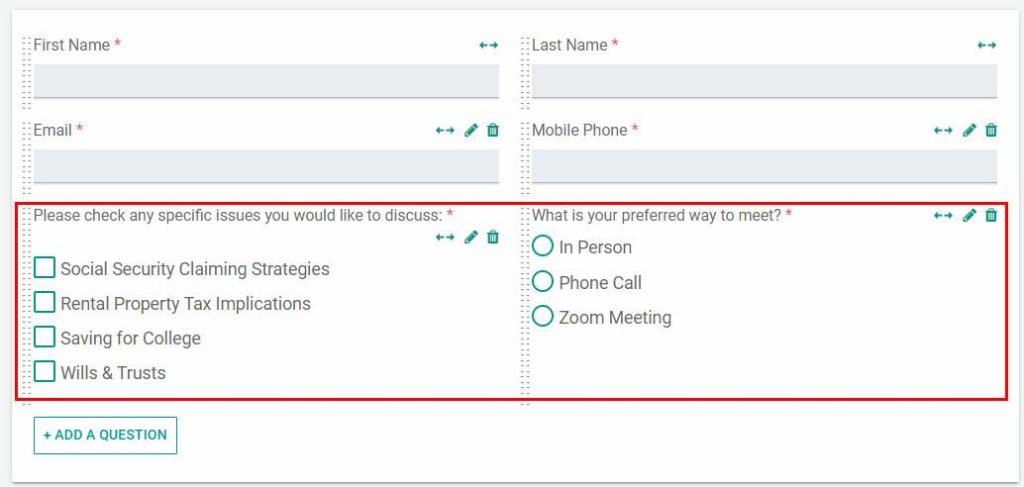
4. You can add Custom Questions (see Custom Questions under Org Settings) that may help you understand the needs of new clients or even how they would like to meet. The answers to the questions will be available in Redtail’s activity description and can be used as custom criteria in your reminder templates.
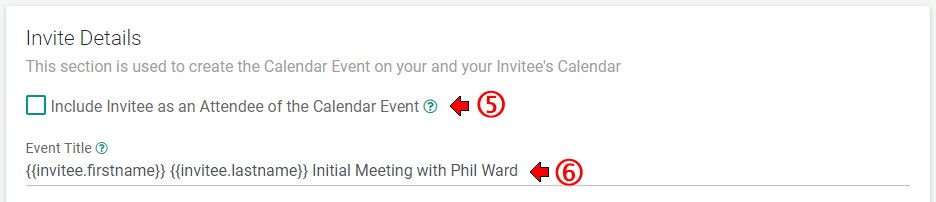
5. Uncheck “Include Invitee as an Attendee…” to eliminate the client from receiving notifications from Redtail on your event and instead, use Initial Booking reminders. Read more about this option here.
6. Add verbiage to the Event Title that can help your client understand the nature of the meeting and can be used as Custom Criteria when sending client reminders.
Host Settings
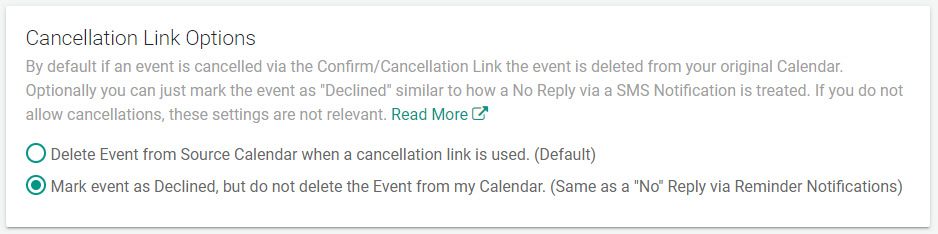
Most advisors wish to leave cancelled appointments on their calendar. To make sure that no appointments are deleted by a client who might use a cancellation link (if you provide one), under Host Settings, select Mark event as Declined but do not delete the Event…
Client Reminders
Client Reminders can be setup at the User Level (each advisor has their own set of reminders) or the Management Level (a set of reminders can be used by advisors assigned a specific profile).
Client Reminder Settings
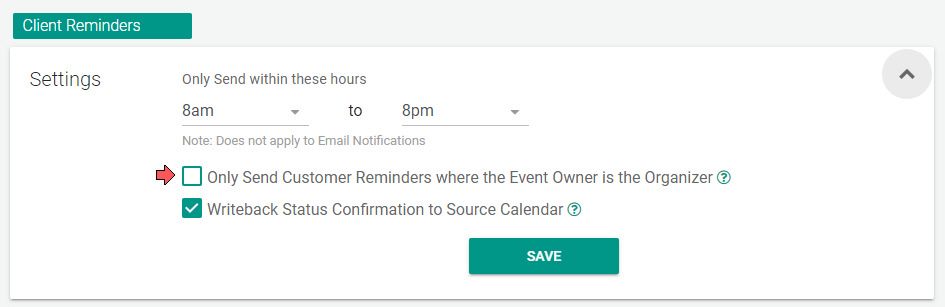
As an administrator, if you schedule activities manually onto Redtail Calendar for advisors in your firm, you will be the “Creator” of the activity in Redtail and GReminders sees you as the event “Organizer”.
Because of this, under Client Reminder Settings (found just above Reminder Templates) you will need to make sure that you UNCHECK, “Only Send Customer Reminders where the Event Owner is the Organizer”. This will allow reminders to be sent, even when the advisor is not the creator of the event.
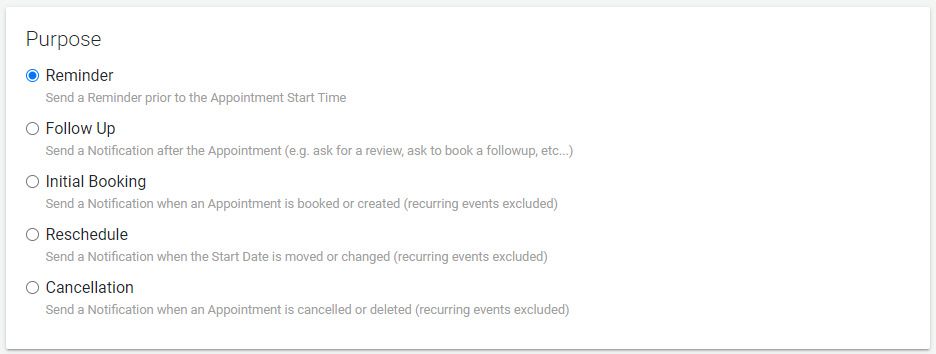
Setting the Purpose
GReminders allows you to send Initial booking notifications, standard reminders, follow up reminders, and notifications when meetings are rescheduled or cancelled.
Custom Criteria
One of the most powerful features of GReminders is our expandable Custom Criteria. Using Custom Criteria you can send specific reminders for specific types of events.
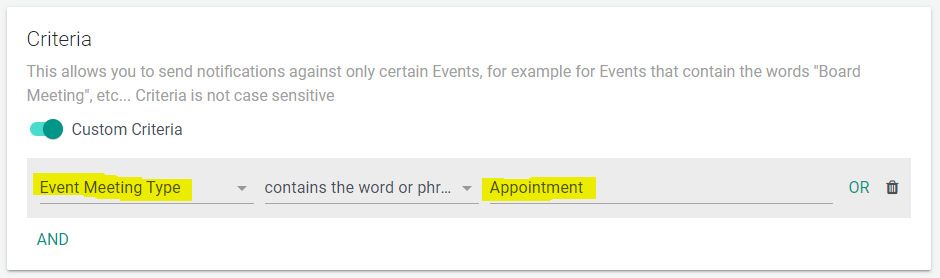
In the above example, this reminder will only be triggered when Appointment is the Activity Type in Redtail. You can add more criteria by selecting AND or OR.
Timing
Next, you’ll determine what type of reminder to schedule and when you would like the reminder to be sent.

You can choose between SMS, Email or Phone Call reminders. The timing options are different, depending on the purpose of the reminder.
Note: When creating Initial Booking Reminders, Retail users should select a delay of at least 1 hour to allow any additional information you may wish to add to a manually scheduled appointment after selecting “Create & Edit” in Redtail.
Content
You have complete control over your content. Customize your message and include specific details about the appointment. If you include links in SMS reminders, our system will automatically shorten the link, making your messages succinct and easy to read.
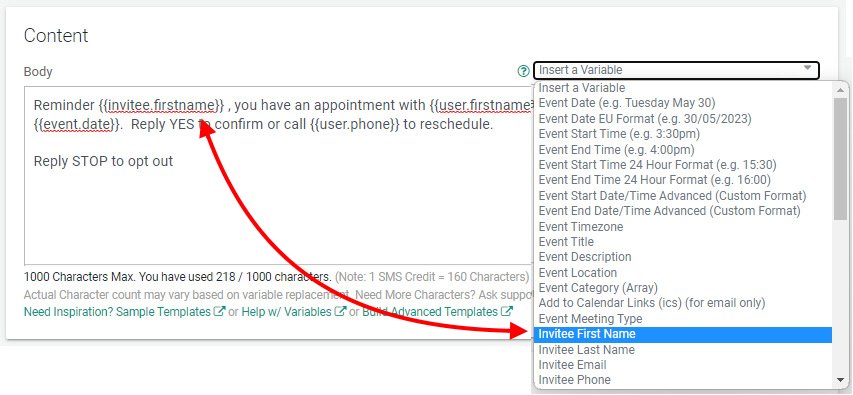
Use the Insert a Variable dropdown list to add variables to content. To include a variable, place your cursor at the point you wish to add a variable and select it from the dropdown list.
Since you’ll be integrated with Retail CRM, you can include the Invitee First Name variable to personalize your reminders.
Use the Preview button to view the content you’ve created, see an approximate number of characters used, and even send yourself a sample of the message to your phone or email.
Use Code in the Content to Reduce Number of Reminder Templates
You can also include Liquid Template Code in your messages to create several possible messages within a single Reminder Template. For example, while the Custom Criteria above will only trigger a reminder if the Activity Type in Redtail is Appointment, you might want to include a different message depending on the type of appointment. This could be accomplished using code in the body of the message.
{% assign eventtitle = event.title | downcase %}


{% if eventtitle contains "initial" %}
An Initial Appointment has been scheduled with {{user.firstname}} {{user.lastname}} at {{event.time}} on {{event.date}}.
{% elsif eventtitle contains "annual review" %}
Your Annual Review with {{user.firstname}} {{user.lastname}} has been scheduled for {{event.time}} on {{event.date}}.
{% else %}
An Appointment has been scheduled with Metro Financial at {{event.time}} on {{event.date}}.
{% endif %}
The sample above would send a different message depending on the event title (subject in Redtail). The line of code at the top allows for non-case sensitive text when setting up activities in Redtail. Including a generic message at the end will ensure that a reminder will be sent on Appointment Types even if the words Initial or Annual Review are not found in the title.
Note: Creating code can be intimidating, but we are here to help. Schedule a meeting with one of our Customer Success representatives to help you with creating the most effective reminders.
Typical Reminder Sequencing
Now that we’ve discussed using Custom Criteria and Liquid Template Code to send specific messages to your clients, let’s look at when you may wish to send reminders.
Initial Booking Reminders
It can be very beneficial to schedule an initial booking email that includes a link that allows your clients to add the appointment to their calendar. To learn about setting up Initial Booking reminders with a calendar link, click here and refer to Option #2.
24 – 48 Hour Reminders
A reminder sent either 24 or 48 hours prior to the appointment is extremely effective. This is where you ask your client to confirm by replying YES (or giving them the option to cancel or reschedule). An auto-reply thanking your client for confirming and letting them know you’re expecting them for their appointment helps reduce no-shows to the absolute minimum.
If your clients confirm, you will see a checkmark on your Redtail calendar, so you can quickly scan the day and see at a glance who has confirmed their appointment and who hasn’t.
8:00 am Day of Event
If your client has not confirmed, you may wish to send a reminder at 8:00 am the morning of the appointment asking for confirmation one last time. If they confirm, be sure to thank them with an auto-reply message.
2 hours prior to Event Time
For those who have confirmed in-person appointments, you should remind them 1-2 hours prior to the appointment. You could include a link to Google Maps at this time so they can see any potential traffic delays and leave on time, keeping you on schedule.
5 -15 minutes prior to Event Time
For appointments conducted by phone or remotely online, schedule a reminder 5-15 minutes prior to the meeting. Include any online meeting links or who will be calling and the phone number.
All My Events
To view Event Details, click on All My Events, a specific calendar (if you’ve connected more than one) or just click on the GReminders Logo at the top of the screen to refresh all Events. You’ll see a list of upcoming events schedule on your calendar(s).

Adjacent to the date and time of the event, you’ll see the Title. If the client has confirmed this event, you’ll see a checkmark for a positive confirmation or a red exclamation mark if the client has declined. After the Event Title, a Bell icon will indicate reminders have been or will be sent on this event and the number next to the Bell icon will indicate how many reminders are scheduled.
Click on the Event Title to reveal the details of the Event.
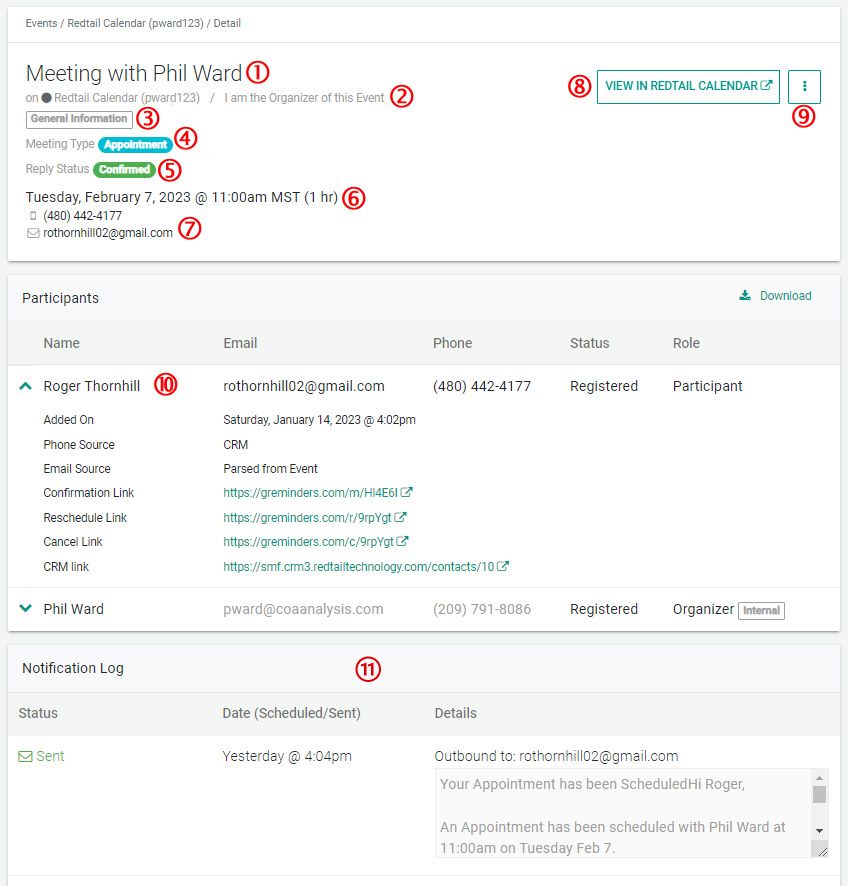
Here’s what you’ll see:
1.) The Event Title.
2.) The Calendar the Event is scheduled on and if the event owner is the Organizer.
3.) The Event Category.
4.) The Event Meeting Type.
5.) The Reply Status, if Available.
6.) The Date, Time and Length of the Event.
7.) Contact information associated with the Event.
8.) Click to view the Activity Details in Redtail
9.) Click to manually Confirm or Decline the Event and Manually change the Meeting type in Redtail.
10.) Participant Details, including:
a. Details about when the event was added to the calendar
b. Where Phone and Email details were imported from.
c. Confirmation, Reschedule, and Cancellation links associated with the event.
d. Link to Contact Details in Redtail
11.) A Record of Reminders sent or scheduled to be sent on this Event. These are dynamic and may change depending on criteria set up in Reminder Templates.
Conclusion
Integrating Redtail with GReminders will allow your prospects and clients to schedule themselves onto your Redtail calendar and receive reminders of their appointments. This will increase your office efficiency and save you time and money.
No two firms are the same and because of the various ways you can set up GReminders, take advantage of our free one-on-one help provided by GReminders’ Customer Success Team. Start by scheduling your Demo HERE.
If you have any aditional questions, contact us here.
Happy Scheduling
FAQs
How do I integrate GReminders with Redtail CRM?
To integrate GReminders with Redtail CRM, start by setting up your GReminders trial using a username and password. When prompted, connect your calendar by selecting Redtail and entering your Redtail credentials. You can then configure integration options such as selecting Redtail activity types, setting how reminders and notes are created, and mapping custom fields. Integration settings can be managed under Org Settings > Integrations > Redtail CRM > Setup Options.
Can I customize reminder messages sent to clients through GReminders?
Yes, GReminders allows full customization of reminder messages. You can personalize content using variables like the invitee's first name, and include specific appointment details. Additionally, you can use Liquid Template Code within messages to create dynamic content that changes based on event titles or other criteria, enabling you to send different messages for different appointment types within a single reminder template.
How can I manage client reminders and confirmations with GReminders and Redtail?
Client reminders can be set up at both the user and management levels. You can schedule initial booking notifications, standard reminders, follow-ups, and notifications for rescheduled or cancelled meetings. Reminders can be sent via SMS, email, or phone calls at customizable times such as 24-48 hours before, the morning of, or minutes prior to the event. Clients can confirm appointments by replying, and confirmations are visible on the Redtail calendar with checkmarks for easy tracking.