Whether you use GReminders automated scheduling or manually schedule appointments directly on Redtail Calendar you have options on how invites are sent to your Redtail contacts.
Using GReminders Automated Scheduling
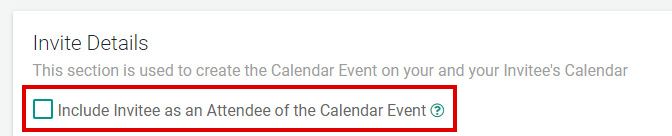
While setting up your Event Type Templates, under Invite Details, there is an option that allows you to decide how to handle event invites.
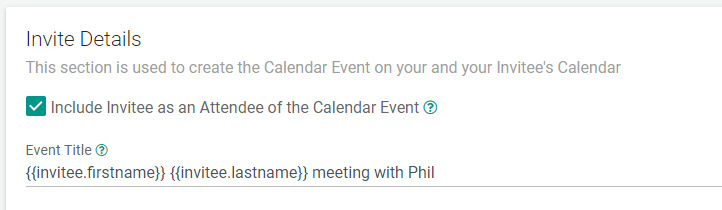
By default, this option is unchecked.
Option #1: Include Invitee as an Attendee
If you choose to include the Invitee as an Attendee, once your client schedules with you, they will receive a notification from Redtail (below).
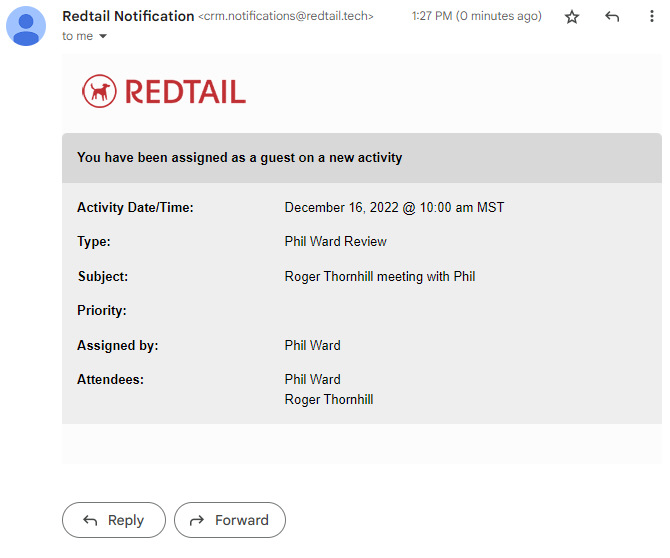
The above notification is sent to your client from Redtail within a minute or two after they have scheduled a meeting with you. They will also receive notifications when you save & complete the activity. This may not be desirable.
Note: If you sync Redtail with Google or Outlook calendar, and integrate GReminders with your Google or Outlook Calendars, events will be scheduled onto your contacts’ calendar. If you add notes to your event description in Redtail, the notes may be visible for your clients to see! Therefore, it is highly recommended if you sync Redtail with Outlook or Google, to UNCHECK the Include Invitee as Attendee checkbox.
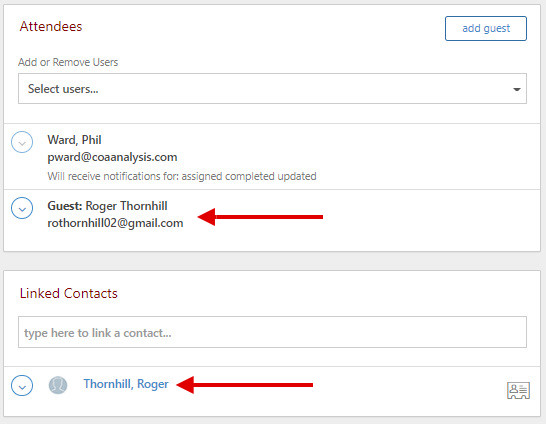
When you include the invitee as an Attendee, your clients will appear as guests and linked contacts in Redtail:
Option #2: Do Not Include Invitee as an Attendee
If you do not want your clients to receive the “New Activity” notification from Redtail and notifications when you Save and Complete Activities, UNCHECK the Include Invitee checkbox.
Then, to notify your clients of the date and times of meetings, create an Initial Booking Email notification in GReminders (and to be sure they look for it, you may wish to send an initial booking SMS notification at the same time, with a message to check their email for additional information).
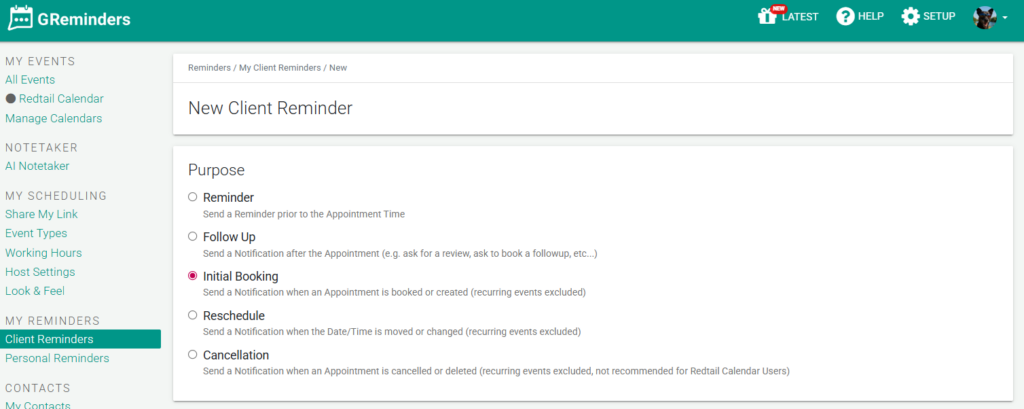

To create an Initial Booking Email Notification, follow these steps:
- Select Initial Booking as the Purpose
- Under Timing, Select Email and a Timing for your Initial Notification
- Edit the subject if you wish
- Include the Add to Calendar custom field from the Insert a Field dropdown list* (Email and SMS reminders have their own Add to Calendar custom fields. Be sure to use the right one)
- Include a Logo if you like
*Note: Any notes you add to the Event Description in Redtail prior to sending the initial booking notification will appear on your clients’ calendar event (in the description). Also, the calendar events using the link are NOT linked to your Redtail calendar directly, hence, any changes you make on your Redtail events (for example, moving events), will NOT be duplicated on your clients’ calendars. Do not use the Add to Calendar Links in reschedule reminders, instead, mention to your client to move the original event on their calendar.
Your initial booking email sent from GReminders will look similar to this:

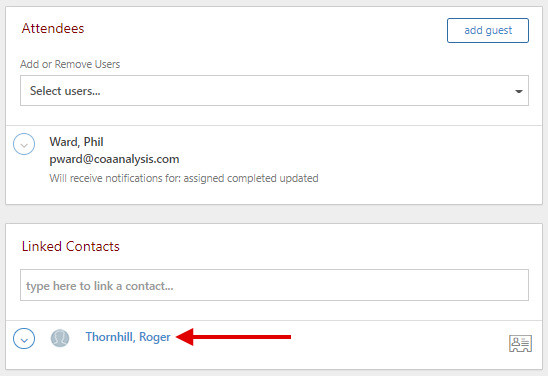
And in the Redtail Activity, your contacts will only be linked to the activity (not included as guests):
Manually Scheduling Appointments in Redtail
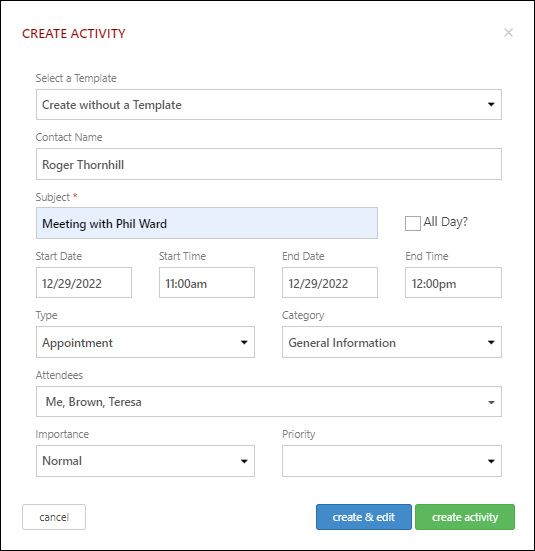
When you manually create meetings in Redtail, an initial booking notification with the Add to Calendar variable, allows your clients to add the appointment to their calendar.
Conclusion
If you integrate GReminders directly with Redtail Calendar, you can decide which of the two options above you would like to use during automated scheduling. If you setup your integration through Google or Outlook, you should disable your contact from receiving an invite to be sure your notes cannot be read by your contact.
Our Calendar link variable lets your clients add the appointment to their calendar when using automated or manual scheduling.
If you have any questions, don’t hesitate to reach out to us here.
If you haven’t tried GReminders with Redtail, you can learn more here.
Happy Scheduling!
FAQs
What happens if I include the invitee as an attendee in GReminders automated scheduling with Redtail?
If you include the invitee as an attendee, your client will receive notifications from Redtail when they schedule a meeting and when you save and complete the activity. The client will appear as a guest and linked contact in Redtail. However, if you sync Redtail with Google or Outlook calendars, notes in the event description may be visible to clients, so it is recommended to uncheck this option in that case.
How can I notify clients of their appointments without including them as attendees in Redtail?
You can uncheck the 'Include Invitee as Attendee' option and instead create an Initial Booking Email notification in GReminders. This email will inform clients of the meeting details and include an 'Add to Calendar' link. You may also send an initial booking SMS to prompt clients to check their email.
What should I be aware of when syncing Redtail with Google or Outlook calendars regarding client invites?
When syncing Redtail with Google or Outlook calendars, it is recommended to disable including contacts as attendees to prevent clients from seeing notes in the event description. Additionally, calendar events created via 'Add to Calendar' links are not linked directly to Redtail, so changes made in Redtail will not update on clients' calendars.