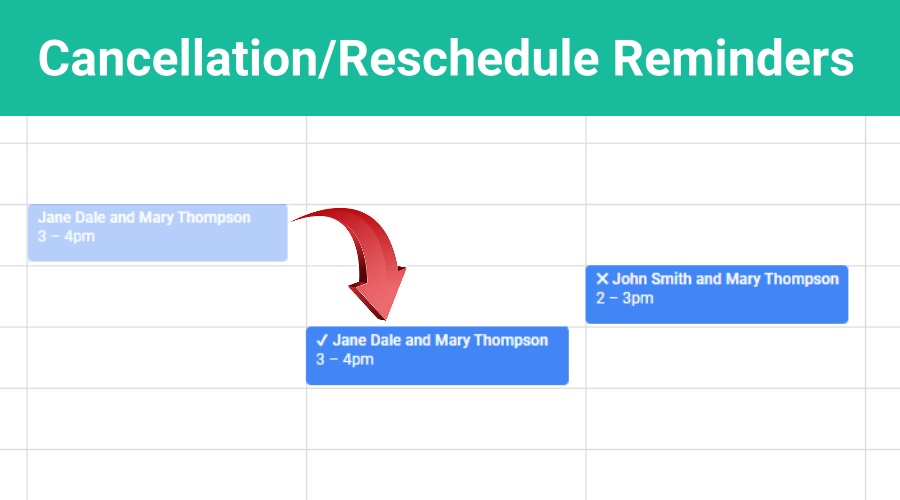
Would you like to send automated Reschedule and Cancellation Notifications to clients?
Be sure your clients understand exactly when meetings will take place, especially when they have been rescheduled, and confirm with clients when appointments are canceled. It’s easy to automate the entire process by setting up Client Reminder Templates in GReminders. No more forgetful people showing up at the wrong time!
Rescheduling an Appointment
There are three ways an appointment on your calendar can be rescheduled using GReminders.
1.) If you use GReminders automated scheduling, your client will receive an invite to your event with a link to reschedule the appointment. The client clicks on the link and reschedules themselves.
2.) You can include a Reschedule link in your reminders. Once again, your client clicks a link and chooses another date/time on your scheduling calendar.
3.) You move the event on your calendar to another date/time. This can be the result of your client calling and requesting the rescheduling, or you move the appointment unilaterally.
In the first two scenarios, your clients will be the person who changed the appointment and, in most cases, will automatically receive an email notification of the change. However, in the 3rd situation, it could be helpful for the client to receive some type of notification of the rescheduled event.
Let’s take a look at a couple of the examples:
Your Client Calls to Reschedule
Your client calls you and asks to reschedule their appointment. You want to make sure that the client receives written confirmation of the new time so there is no confusion about what time the appointment will take place.
To create notifications that clients will receive shortly after you move an event on your calendar, follow these steps:
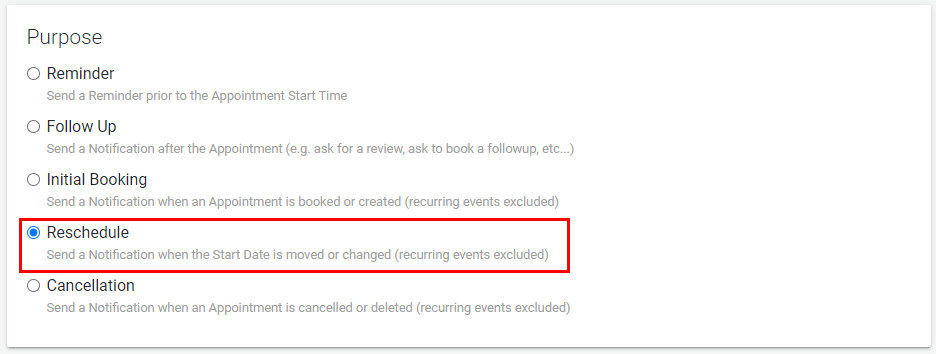
Open the Client Reminder Templates and select Reschedule as the Purpose of the Reminder.
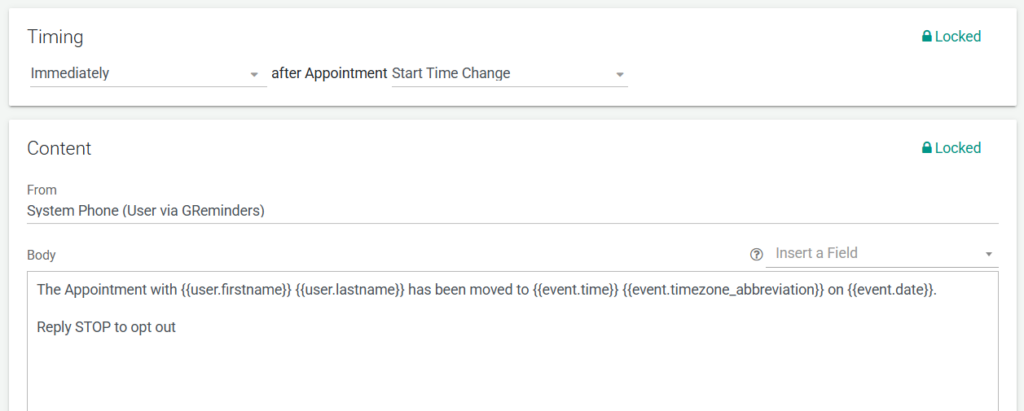
Create a simple message to confirm the date and time of the rescheduled appointment. The message shown in the example above is added by default to the body when “Reschedule” is selected for SMS Reminder Notifications.
The client receives the following:
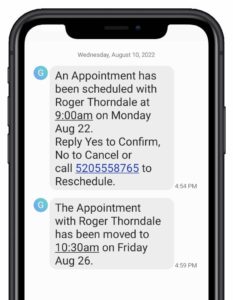
The original reminder the client received is on top and after you move the event on your calendar, the Reschedule reminder is sent (bottom). This eliminates any possible confusion and provides written notification the client can use to ensure they show up on the right day and time.
Note: If your client has confirmed the meeting prior to the reschedule, the confirmation status will be reset (to unconfirmed). This is the perfect opportunity to create a reminder template based on the unconfirmed status.
Rescheduling the Appointment Unilaterally
There are times when something comes up and you need to reschedule a meeting. Setting up the Reschedule reminder notification below will help reduce the back and forth of trying to find another time to meet.
Begin by selecting Reschedule as the Purpose.
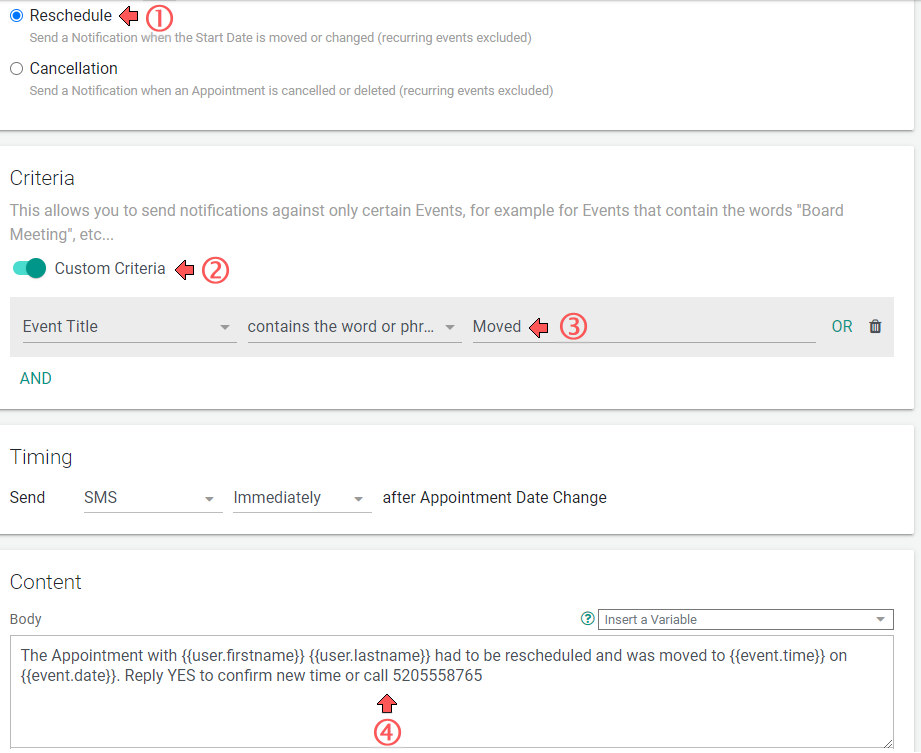
Create a Custom Criteria (Event Title contains the word or phrase), and include a word or phrase that is only used for situations when you move an appointment on your calendar unilaterally.
Then include verbiage that lets your clients know that you had to reschedule the appointment and ask them to confirm if the new date will work for them.
If your client has already confirmed the original appointment, the confirmation status will be reset automatically so if you see a confirmation checkmark, you’ll know your client has accepted the new time to meet (you can also receive notification of this by email and/or SMS).
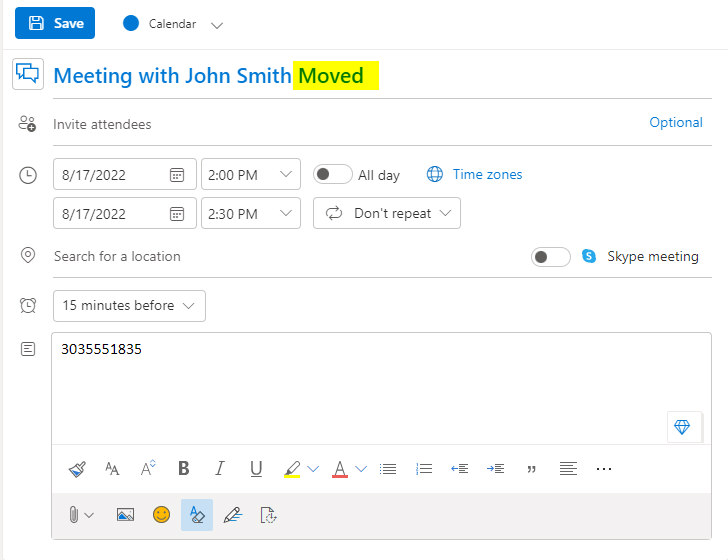
Next, Open the Event on your Google or Outlook calendar and select Edit. Then add the keyword you chose (Moved, in the example) to the title, change to the new time, and save.
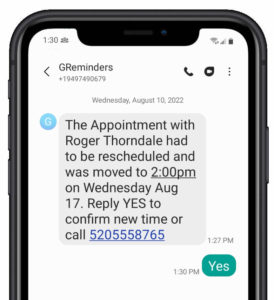
A few minutes later, your client will receive the following message and can confirm if the new time will work:
Cancellation Notification
Just like rescheduling, there are several ways your clients can cancel an appointment using a cancelation link. But in the following examples, we’ll be looking at situations when no cancelation link is used.
Clients Cancel Events by Replying “No”
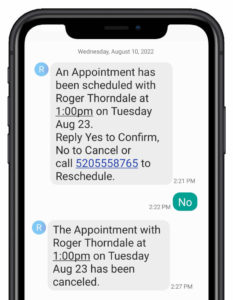
In the example above, your client responded “No” when asked to confirm their appointment. Within a few minutes of doing so, an automated response is sent confirming their cancellation. An exclamation mark will appear in GReminders next to the event and if Writeback Status to Source calendar is selected, an X will appear next to the appointment on your calendar.
Setting up an Automated Cancellation Notification
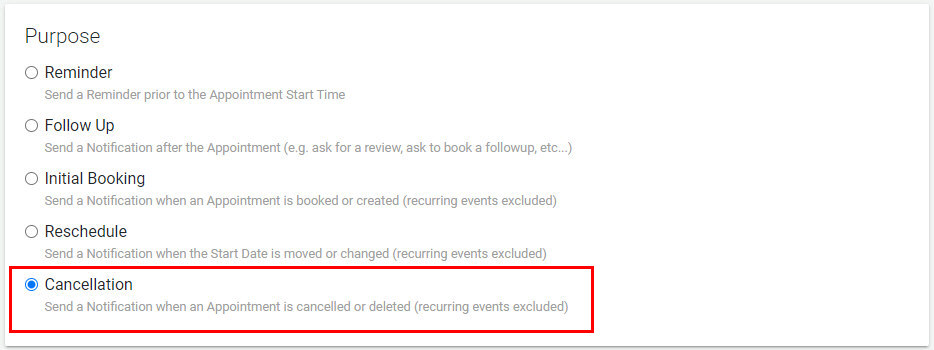
To set up an automated Cancellation Notification, in Client Reminders, select Cancellation as the purpose of the Reminder Template.
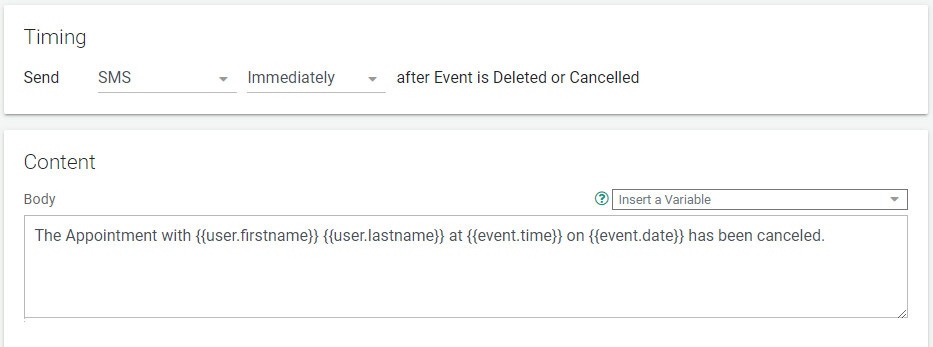
A default message will confirm the cancellation with your prospect. You can add verbiage to the content, for example, you may wish to include a phone number to call to reschedule at a later date.
Manually Deleting an Event from your Calendar
If clients call or email you to cancel their appointments and you delete the appointment from your calendar, clients will receive the same notification that was described above.
If you would like to manually cancel an appointment but leave the appointment on your calendar, follow the steps below:
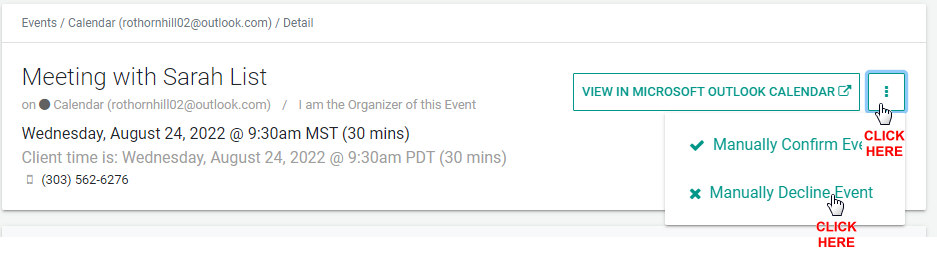
Open GReminders and click on the Title of the event you would like to cancel. Select the three dots in the upper right corner of the screen and select Manually Decline Event.
Additional Rescheduling and Cancellation Info
To learn how to control how cancellations are shown on your calendar, click here.
Learn how to Send Confirmation Links in SMS Reminders, here.
Learn about creating a cancellation policy, here.
Conclusion
Providing Reschedule and Cancellation Notifications to clients will help you communicate effectively during the appointment process and eliminate any potential misunderstandings. Just another advantage of using GReminders automated Reminder system.
If you haven’t tried GReminders yet, sign up for a free trial by clicking Try it Free Today on this page. Then, be sure to schedule a complimentary, one-on-one system setup call with one of our Customer Success Representatives. We’ll help you configure your reminders so you can drastically reduce your no-shows.
If you have any questions, contact us here.