Creating an online booking calendar using an appointment schedule template can save you a great deal of time scheduling clients. The process of manual scheduling can include several outbound calls to clients, many of which result in voicemail. When your client returns your calls, you’ll receive voicemail if you’re not available. It is unproductive and inefficient.
The solution to this problem is allowing your clients to book appointments onto your calendar using automated online scheduling. As a result, clients schedule with you at their leisure, and you eliminate all the back and forth involved with traditional scheduling.
Getting Started
You can get started with automating your scheduling by signing up for a free trial of GReminders.
GReminders has developed an Appointment Schedule Template that helps users set up events very quickly. In addition, the template contains default values that users can customize for their specific event types.
Event Type Set up
The first section of the appointment schedule template is where you include a name for your event type and a short description that your clients can read prior to booking with you.

The location field can contain a physical location like your office, or this is where you could include a link to online meeting applications like Zoom, WebEx, Google Meet, etc.
You can also use custom variables in the location field. Custom variables are created by adding custom question fields that your clients complete during appointment scheduling (discussed later in this article).
Event Bookings Setup
The Event Bookings section of the appointment schedule template provides options that help you control when clients can schedule with you.
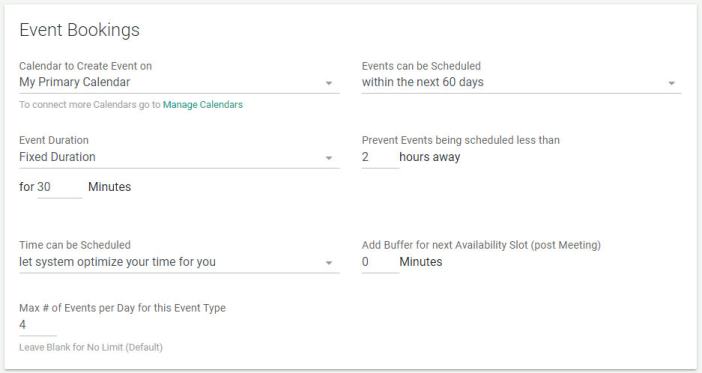
You begin by selecting which calendar to create the event on. For example, you may have multiple calendars connected to GReminders, a calendar for one-on-one events, and another for group events.
Next, determine how far out you will allow someone to schedule this type of meeting. The default is 60 days, but you can extend that time or even include an expiration date for this event type.
Under Event Duration, choose how long you would like this event to last. You can also give your client the option to change the length of the meeting (within the parameters you set).
You can determine how far in advance you will allow people to schedule meetings with you. If you work at your desk throughout the day, a short period of time, perhaps an hour or two, will probably be fine. If, however, you work outside the office, or you need several hours to prepare for an appointment, you may wish to prevent events from being scheduled less than 24 or 72 hours away.
You can let our system optimize your time for you, or you can manually control when you wish to start appointments. For example, if you want to start all of your appointments on the hour, you can select that as an option. If you don’t then your clients could schedule an hour-long appointment beginning at the half-hour mark. It is really up to you how you wish to organize your time.
There is an option to add a buffer between meetings, giving yourself a breather and time to catch up on calls, etc.
Finally, under the Event Bookings setup portion of the appointment schedule template, you can indicate the maximum number of this event type you wish to have scheduled with you each day. Leave the input blank if it doesn’t make a difference.
Setting Your Availability
The next section of the appointment schedule template is where you indicate your availability for this event type. For some individuals, this is very basic, something like 9:00 am to 5:00 pm. You may, however, wish to take complete control over each day of the week. To do that, select the Advanced checkbox to use Advanced Availability Settings.
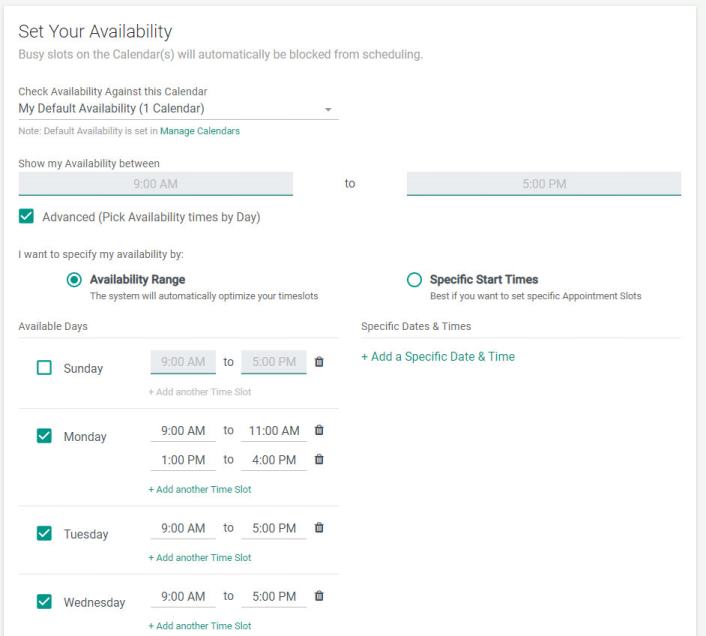
Now you can determine when you will be available for this event type each day of the week. Indicate as many Time Slots as you like as the system allows slots as brief as 5 minutes.
You can also select to start events at a specific time each day. Select the Specific Start Times radio button. You’ll see that under Available Days, only the start time appears. This means if you choose 9:00 am and 11:00 am, only two appointments slots would be available for scheduling, regardless of the length of the actual appointment.
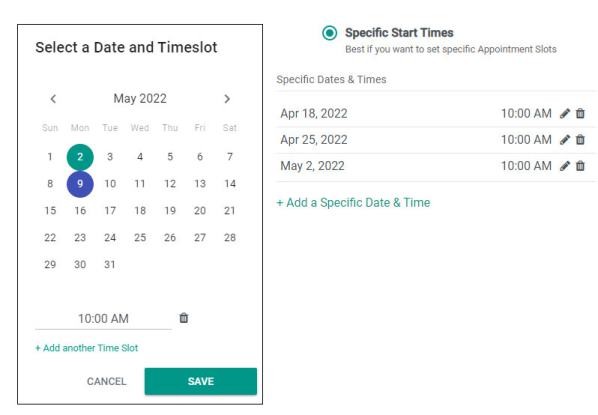
If you would like to set up events for specific days, deselect the days of the week on the left and click on “Add Specific Date & Time”. Then select the specific day and the time(s) of your event(s). If you would like to set up an event that will last multiple days, that is possible. You can read more about multi-day scheduling, Here.
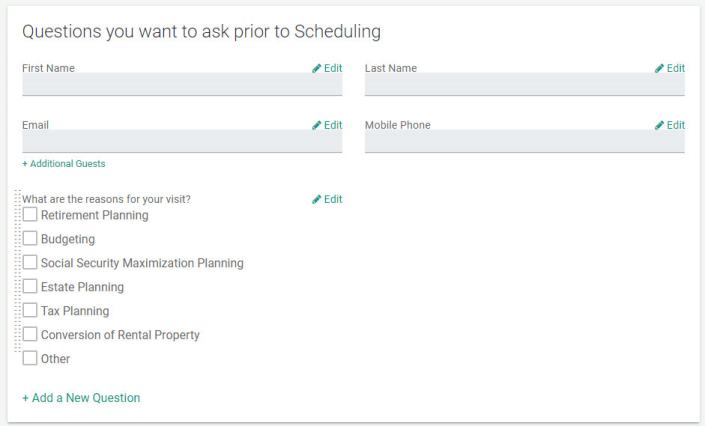
Ask Questions During Online Automated Scheduling
There are four default questions available when you first set up your event type in the appointment schedule template, first and last name, email address, and mobile phone number. You can, however, add an unlimited number of additional questions you may wish your client to answer prior to an appointment. This can be especially important when scheduling initial meetings with clients.
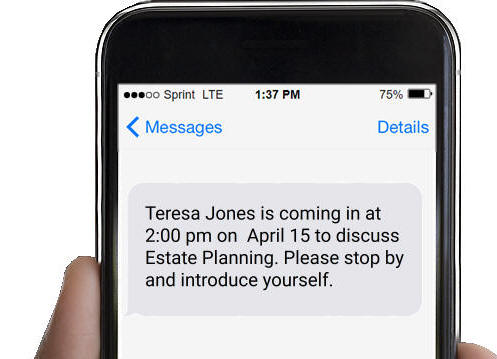
Not only can you ask questions, but you can then use the answers in reminders.
You can also use Personal Reminders to notify colleagues that a new client who may require their expertise is coming into the office for a meeting:
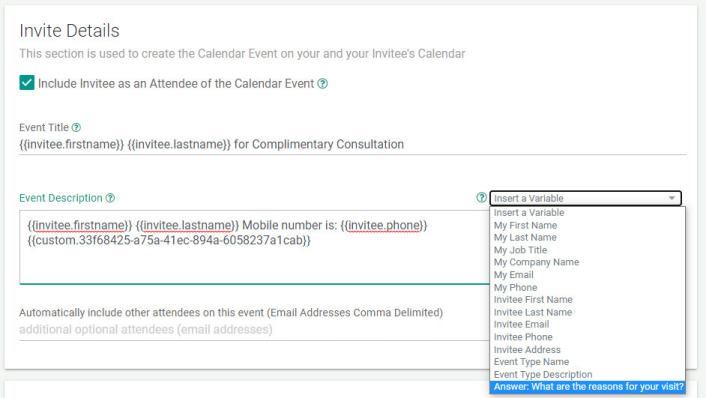
Invite Details
The next section in the appointment schedule template is the Invite details. Include a custom event title and event description. Using the variable drop-down list, insert variables into the description, including custom variables that were created by custom questions you added during the previous step.
Sending the calendar event invite is the default setting and is intended primarily for B2B meetings. If you are a B2C business, you may decide that instead of sending a calendar invite, you would prefer to send an initial booking email reminder. To accomplish this, uncheck the “Include Invitee as an Attendee of the Calendar Event” checkbox.
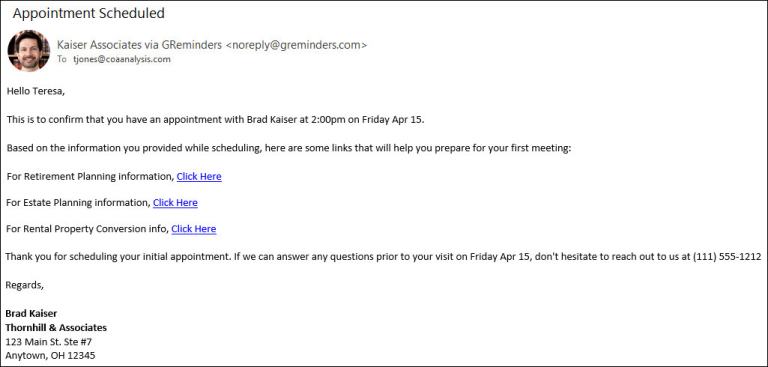
Below is a typical initial booking reminder template you can create to replace the automated calendar invite. You can access the template under Reminders > Client Reminders or under Org Settings > Client Reminders:
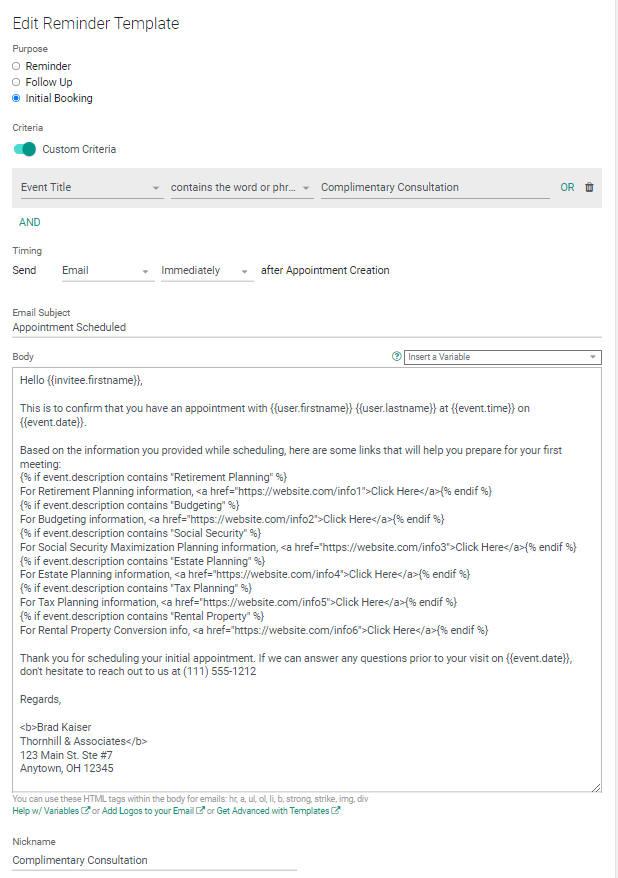
The initial booking template shown above is set up to trigger when the Event Title contains the words, Complimentary Consultation. The statements in the body of the email are created to direct the invitee to view additional information about topics they indicated they were interested in during the scheduling process (the email example above was created using this template).
Payment Details
If you would like to accept payments during automated online scheduling, GReminders allows integration with Stripe payment processing.
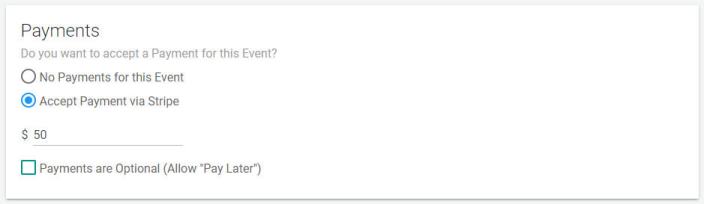
After following the instructions for Stripe integration, determine if you would like to accept payments for the event, the amount of the payment and whether you would like to offer your clients the opportunity to pay later.
You can also set up discount codes under the Org Setting menu. For more information, click here.
Thank You Page
Finally, you can determine how you would like to thank your invitee for scheduling with you.
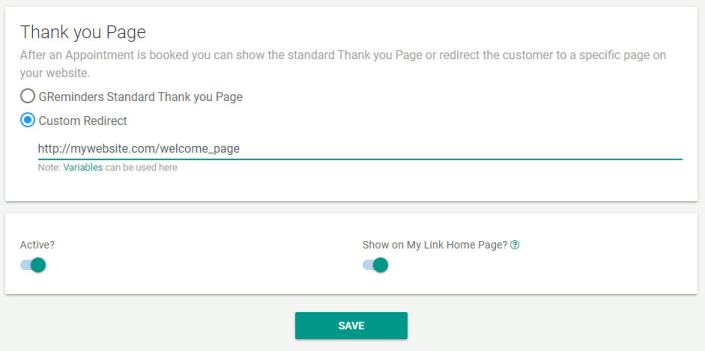
You can leave the default Standard Thank you Page selected or you can link to a specific URL. You can even include variables in the link, to pre-fill forms on the page you link to. For more information, about including variables in your link, click here.
Don’t forget to save your template and you are ready to share your booking link with your prospects and clients.
GReminders’ appointment schedule template provides a single place to create your online scheduling event calendar. For basic scheduling, you can use the pre-filled default values and complete your setup in a minute or two. If you need to indicate special times you’ll allow scheduling, ask important intake questions, accept payments, and link to additional information after scheduling, it can all be done using the full-featured template described here.
If you have any questions, please contact us.
You can sign up for a free trial of GReminders by clicking the link below, and don’t forget to sign up for a complimentary one-on-one call with a GReminders customer success representative that can help you set up our system so you can get the most out of it.
Happy Scheduling!