We’ve made a meaningful upgrade to how Locations work in scheduling—treating them as a true first-class citizen in the booking experience.
Location Comes First
If an Event Type supports multiple locations, invitees now select the Location before choosing a date and time. This applies to both 1:1 and Team Event Types and ensures availability is calculated correctly from the start—based on the right place, the right people, and the right hours.
Why This Matters
This change unlocks more flexibility and accuracy:
- Multiple locations per Event Type
Each Event Type can support multiple locations, each with its own working hours. - Locations are foundational
Rooms and resources now require a Location to exist first, making setup cleaner and more consistent. - Working hours are tied to Locations
Everyone defaults to their “Primary” location, but hours can vary by location. - Team Event Types get smarter
Each user on a team can have different working hours per location, allowing for realistic, real-world scheduling. - Automatic handling of unsupported locations
If a location doesn’t apply to a user (for example, Zoom isn’t connected), that user will be excluded from availability—or the web meeting simply won’t be created.
Fewer Event Types. Way Less Admin.
Previously, if you had five different offices, you had to create five separate Event Types—one per location. Any change meant updating all five, turning simple scheduling into a management headache.
Now, one Event Type can handle all locations. Each user can have their own working hours PER location – all managed in a single place. You get cleaner setup, fewer errors, and dramatically less admin work, while clients get a simpler, more intuitive booking experience.
A Better Booking Experience
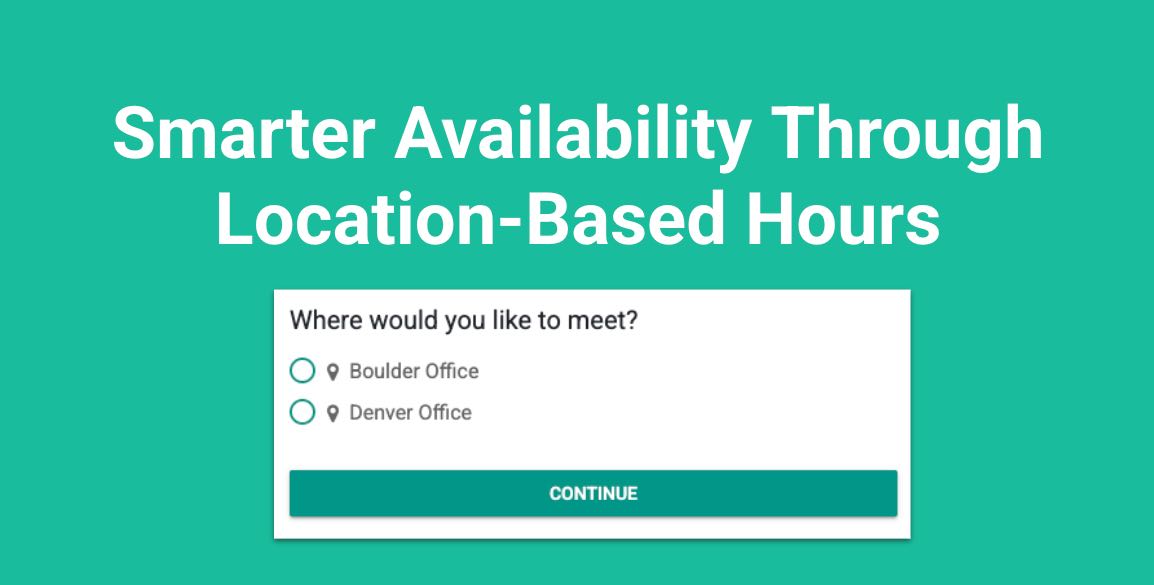
On the public booking page, when multiple locations are available, invitees are first asked “Where?” and only then shown available dates and times. The result is fewer conflicts, clearer expectations, and more accurate availability.
How it Works
First setup Locations. Setup > Locations

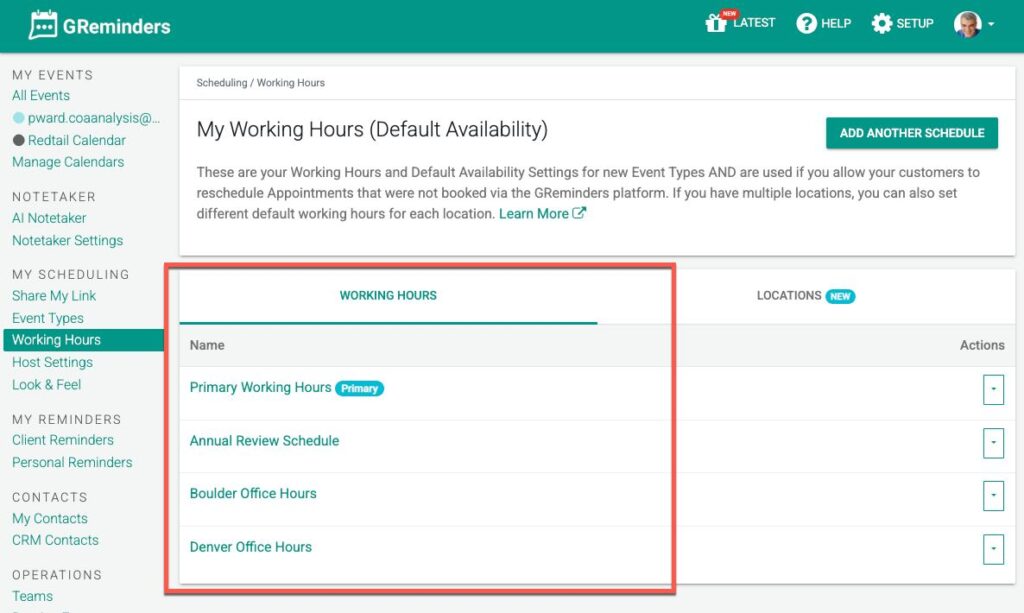
Next, the users that work in that office can set their Working Hours. Have the User go to My Scheduling > Working Hours and set up different working hours
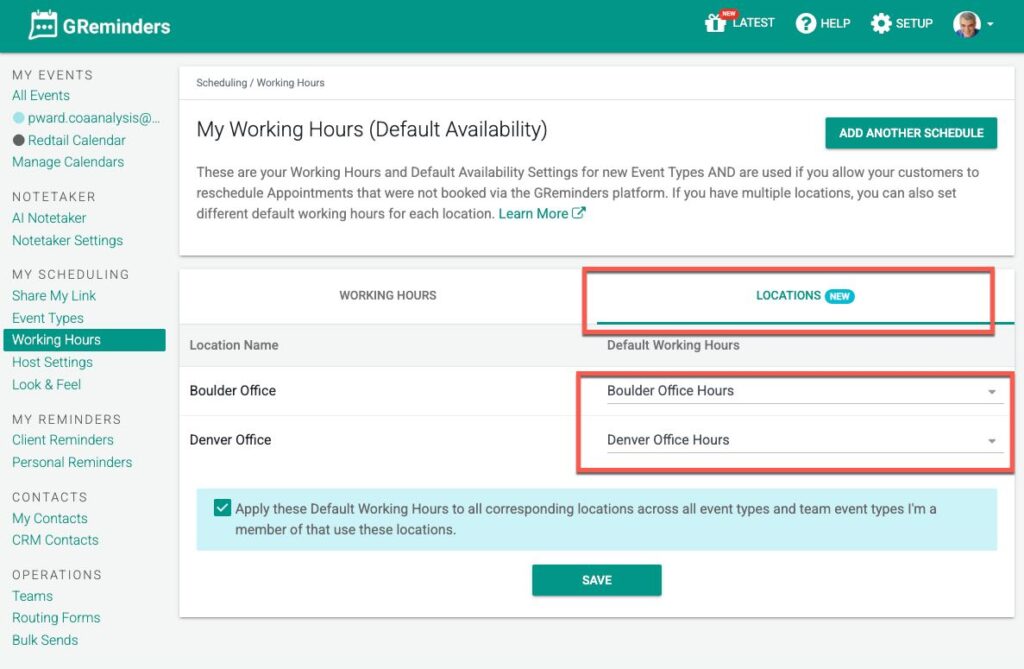
Next, click on the Locations tab and assign the default working hours to the Locations
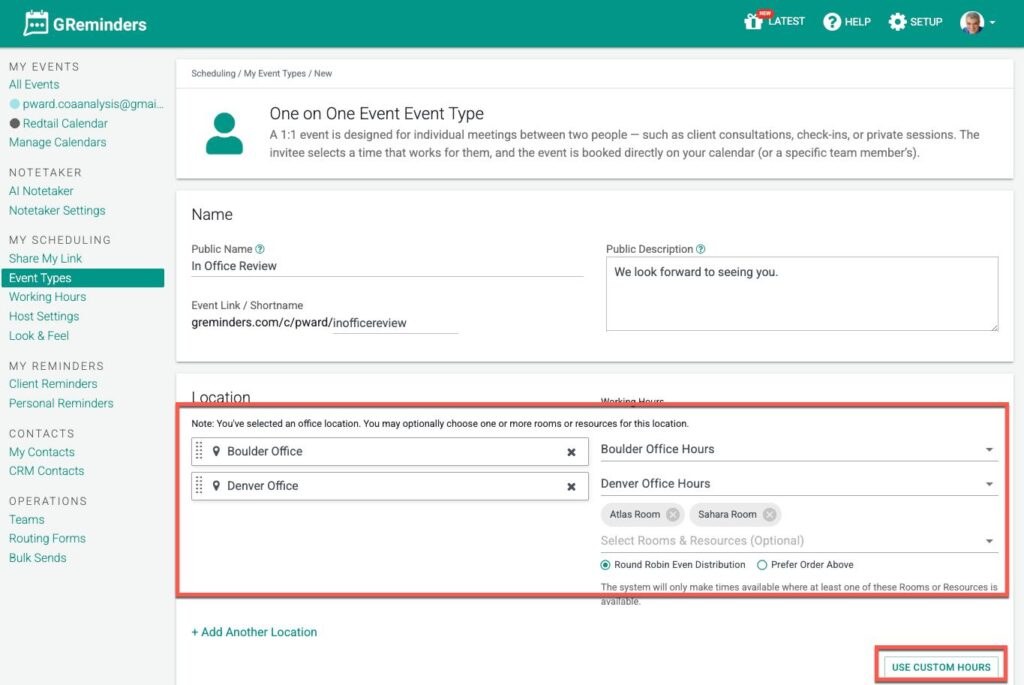
Now, once you edit or create a new Event Type, you can select Multiple Locations, AND then assign different working hours PER Location!
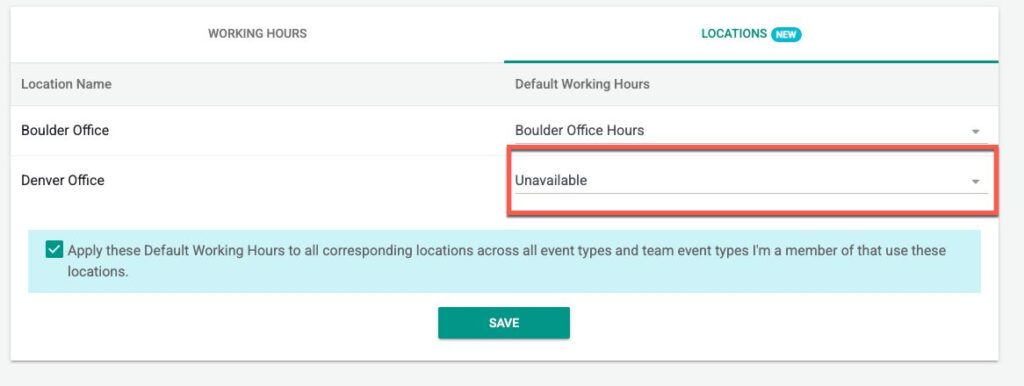
If you never meet clients in a certain office or location, you can now mark yourself as unavailable there. For example, if you never travel to the Denver Office, set Denver to “Unavailable”. When a client selects Denver, no meeting times will appear – ensuring you’re never booked where you don’t actually work.
You can choose the default, OR you can select different working hours, OR even apply Custom Working Hours.
Also, when configuring your Event Types, you will find an additional option in the Meeting Type and Meeting Category dropdown menu titled: Advanced – Location Based.

This feature is designed for users who offer multiple locations within a single event type but require different meeting classifications for each. By selecting Edit, a pop-up window appears where you can map a specific Meeting Type or Meeting Category to each unique location.
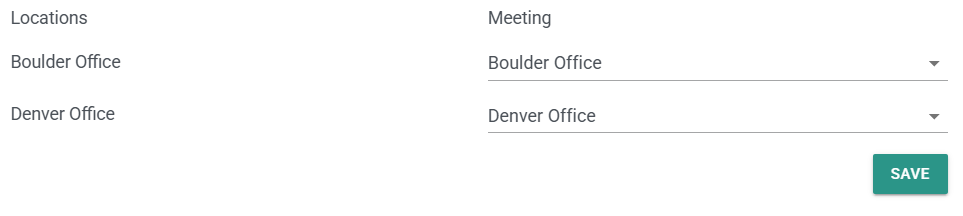
By utilizing this advanced setting, the system automatically assigns the designated meeting type or meeting category the moment a client selects their location. This ensures high-level organizational precision and eliminates the need for manual administrative updates or re-classifying appointments after they have been booked.
Once your locations and meeting types are mapped, the client experience reflects these settings instantly. When you share the Event Type link, your invitees are first prompted to select their preferred meeting location before seeing your available dates and times:
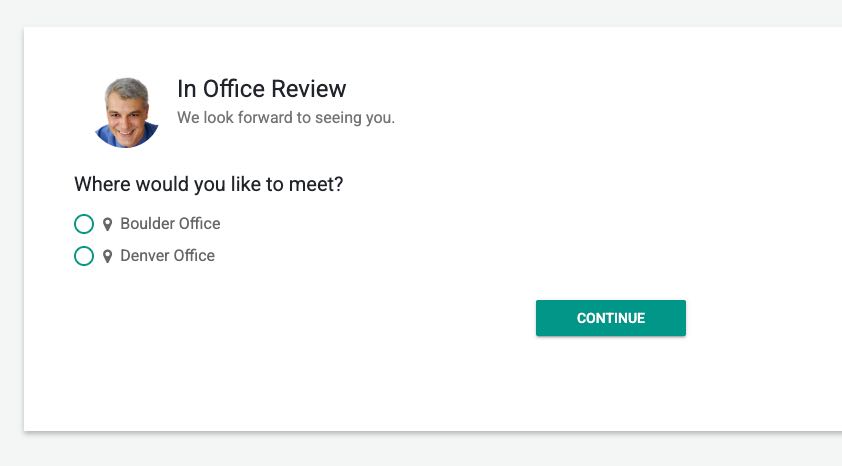
Following their location selection, we will show the right availability based on your Working Hour set.
This dramatically reduces the amount of Event Types you need to manage and will make maintenance and other areas of the application, such as Team Event Types, Routing Forms, etc… much easier to manage.
If you have any questions, please reach out to [email protected]
Keywords: Location Availability