
Microsoft Outlook Calendar has many features that help you organize your schedule, including the ability to categorize your appointments. GReminders can help you optimize your reminders by sending SMS Outlook Reminders based on the categories you create.
Common Uses of Categories
- Create categories to identify Initial Appointments
- Categorize individuals who need additional reminders
- Indicate alternate types of reminders, such as email or voice
- Categorize meetings to send Invites to colleagues and staff
How Outlook Calendar Categories Work
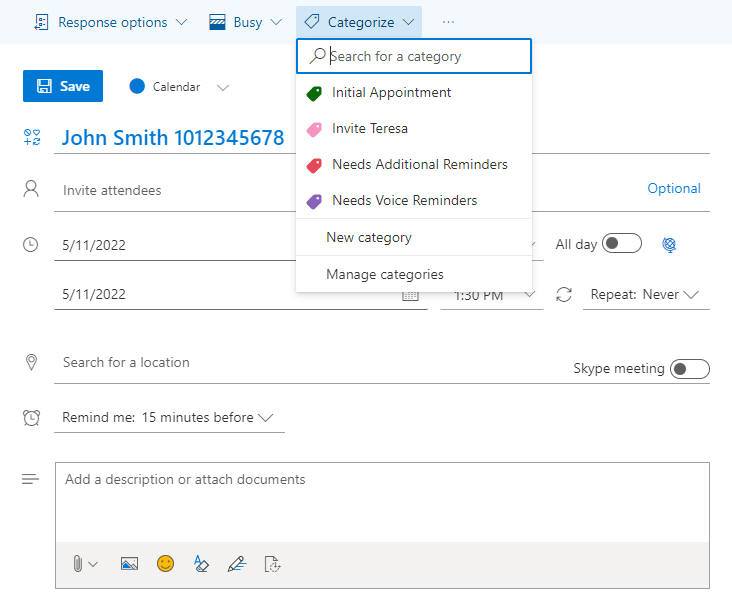
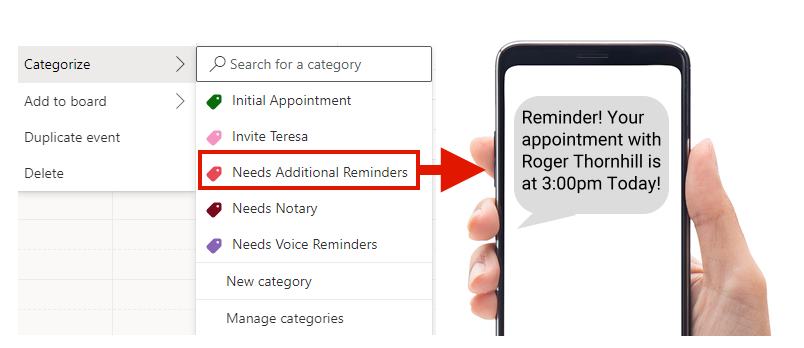
When creating an event in Outlook Calendar, include your clients’ phone numbers and/or email addresses in either the title or description as usual. Then choose “Categorize”.
You can choose one or more categories that you would like to associate with this event. Hint: Choose the most important category last to code the event in that color on your calendar.
The SMS text, email or voice reminders that you have associated with the chosen categories will be scheduled and sent to your clients. Note: The system will not send two reminders of the same type (SMS, email, voice) scheduled at the same time. Arrange reminder templates in order of importance or schedule reminders of the same type at different times (i.e., 2 days before appointment and 24 hours before appointment).
Setting Up Categories
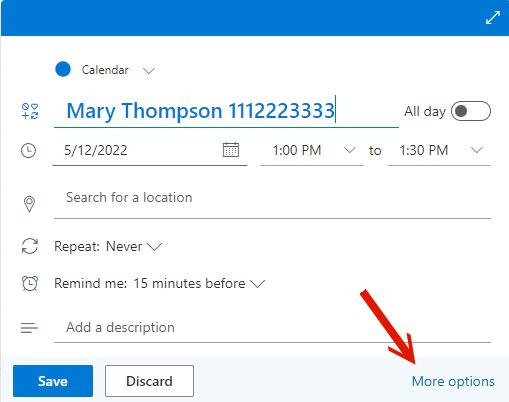
When scheduling an appointment on your Outlook Calendar, choose “More options”.
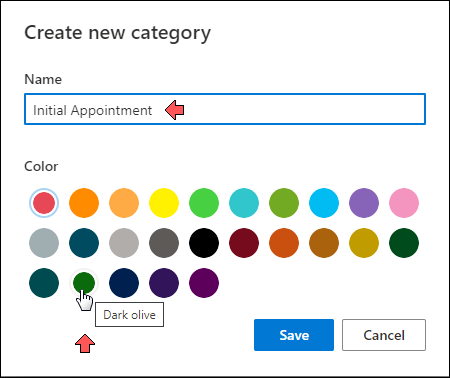
Choose a name for the category and unique color to associate with it. Then Save.
Setting up Reminder Templates for Categories
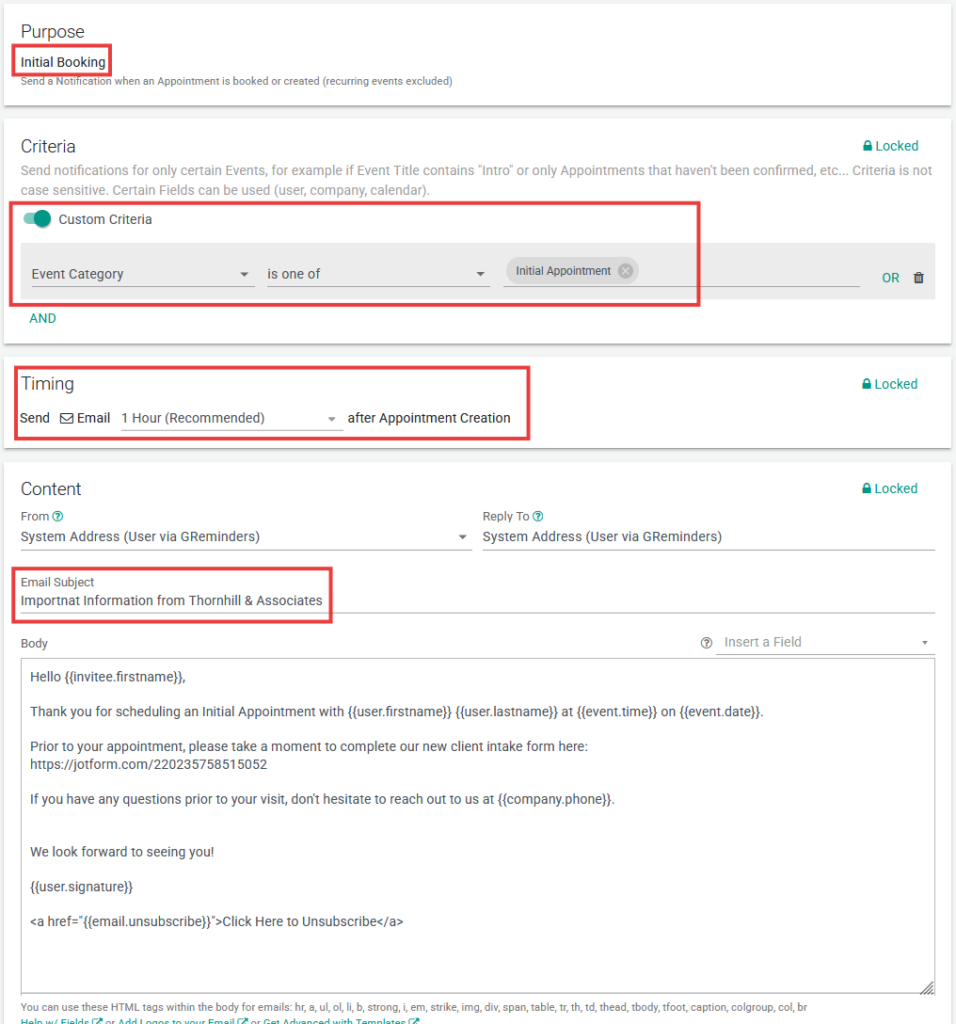
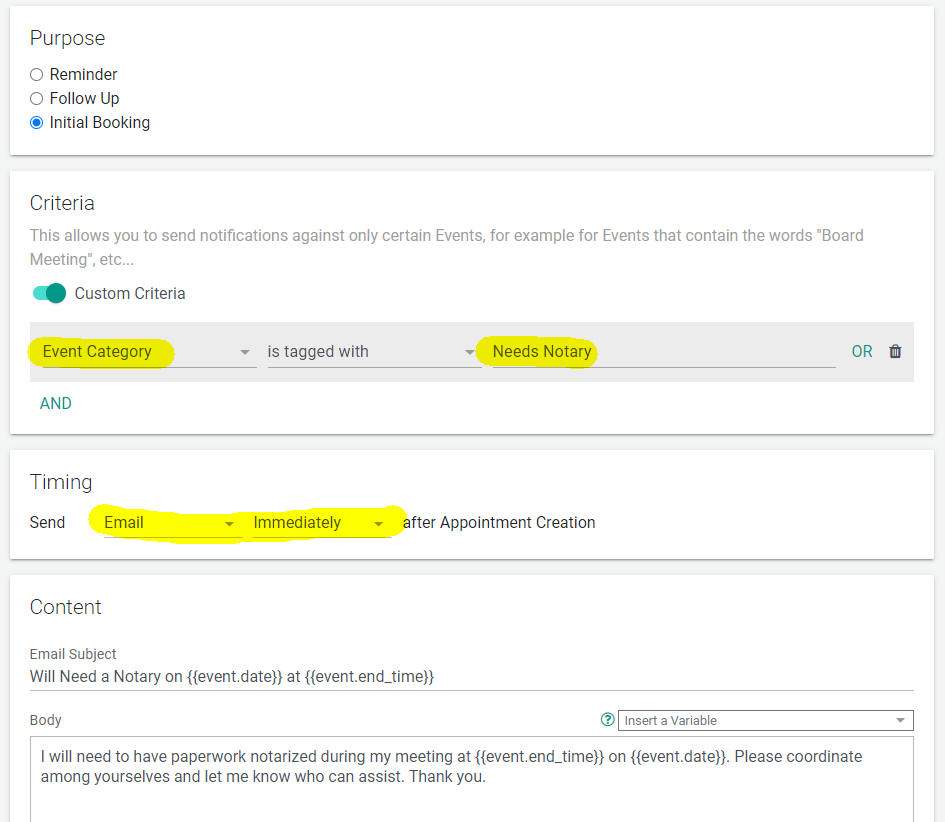
To setup a Client Reminder using the Category Criteria, follow these steps:
- Choose the Reminder Purpose (in this example, an Initial Booking Notification)
- Use the Slider to add Advanced Criteria
- Choose the Criteria: Event Category
- Include the exact same name as you used when setting up the Category in Outlook
- Indicate what type of reminder to send and when
- Include a Subject for Email Reminders
- Edit content specific to this Category
- Create a Nickname for easy organization
Confirm Your Reminders
Go to the All My Events and find the meeting you scheduled on your Outlook calendar using a specific category and click on the title.

The following window will open:
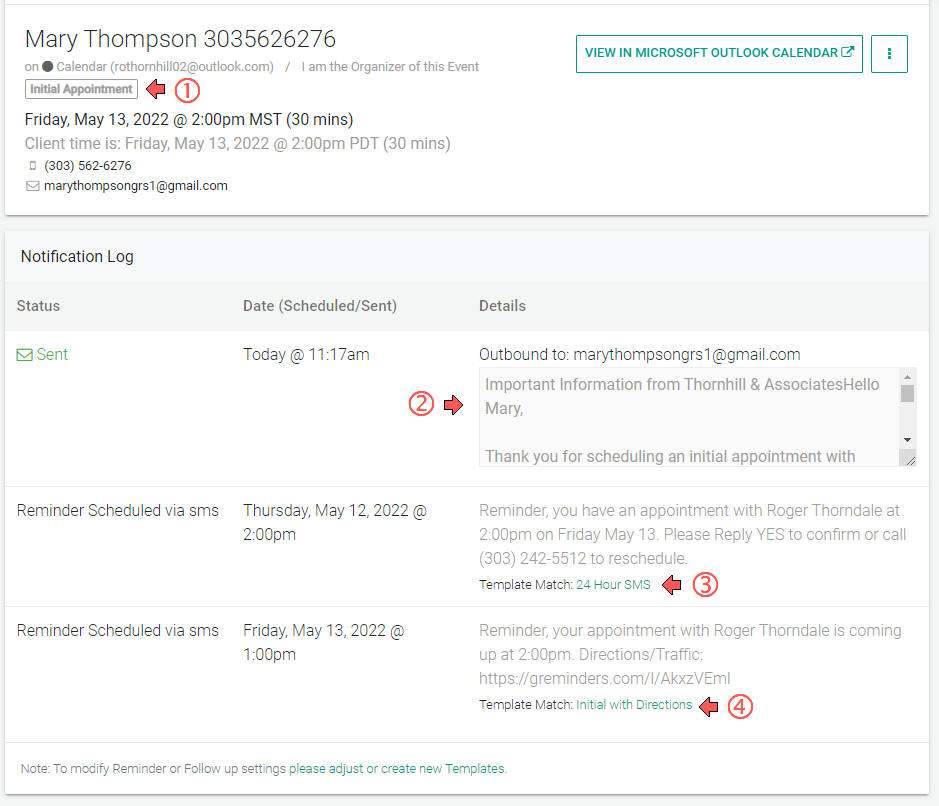
Here is where you’ll find all reminders and replies for this calendar event. Let’s take a look:
- You’ll see the Category that was set for this event at the top of the screen.
- Our Initial Booking Notification we set up above has already been sent.
- A 24-hour SMS Text reminder that goes out to everyone we book is in the queue.
- A 1-hour SMS Text reminder complete with a map to our offices that was created for events with the Initial Appointment Categorization is in the queue as well.
As you can see, sending Outlook Reminders based on Categories can help you send very specific reminders to Clients simply by categorizing the event when the appointment is scheduled.
Categories can also help you, your colleagues, and your staff prepare for appointments. In the following example, you will be signing documents and will want to make sure one of the notaries in the office will be available.
Choosing Existing Categories
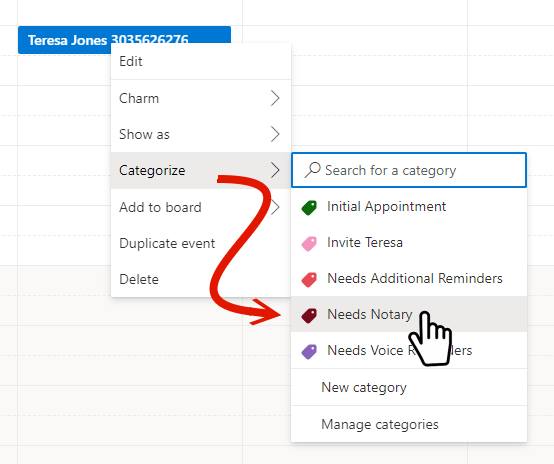
Since the “Needs Notary” category is already set up, right click on the event to select the category you would like to associate with this appointment.
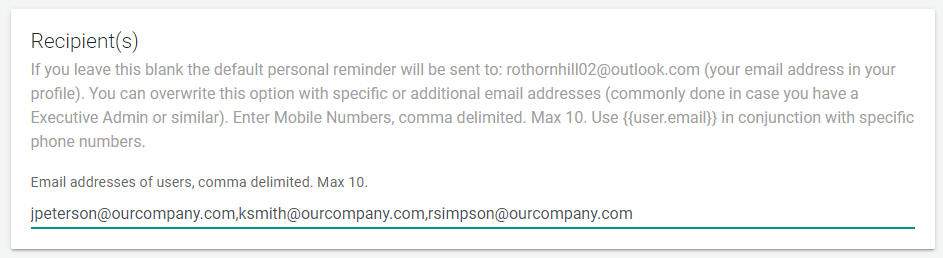
Your Personal Reminder is Set up similar to your Client Reminder:
The only difference is the inclusion of phone numbers or email addresses of colleagues or staff you wish to receive the reminder.
Sending additional SMS Text Reminders based on Assigned Category
We all have those clients who constantly fail to show up for appointments, often claiming they forgot all about it. Using categories, you can immediately identify these clients and send them an additional text reminder a few hours before your meeting.
Using Categories in Reminder Templates Body Content
Additionally you can Use these Categories WITHIN the Reminder Template itself. Please note an Event can have multiple categories, as such they are treated as an “array” instead of a string.
For example:
If you want to just display the categories within your Reminder Template itself you would do:
{{ event.category | join: " and " }}
This basically takes your categories such as “Needs Notary” and “Telehealth” or something like this and makes
Needs Notary and Telehealth
Now if you want to do something more fancy such as use conditional logic within your template you can do something like:
{% if event.category contains 'Needs Notary' %}This is the text that displays if a Notary is needed
{% else %}
Otherwise we do show this
{% endif %}
You can read more about advanced logic here.
You can also send additional reminders based on Confirmation Status. Read more here.
Sending Outlook Reminders based on categories is a quick and efficient way to send reminders to clients and staff. Once you set up your categories and the reminder templates associated with those categories, you control everything from your Microsoft Outlook Calendar. You can use Categories with most versions of Outlook, including Office 365 and Microsoft Exchange.
While Categories are determined by the individual user, large organizations, can “push” categories across their entire organization. If you would like more information, contact us here.