Booking Zoom Meetings Without Back-and-Forth
This video demonstrates how your clients can book a Zoom appointment directly onto your calendar, eliminating the back-and-forth typically involved in scheduling. GReminders integrates with multiple web conferencing providers, allowing meetings to be automatically created and synced with your calendar.
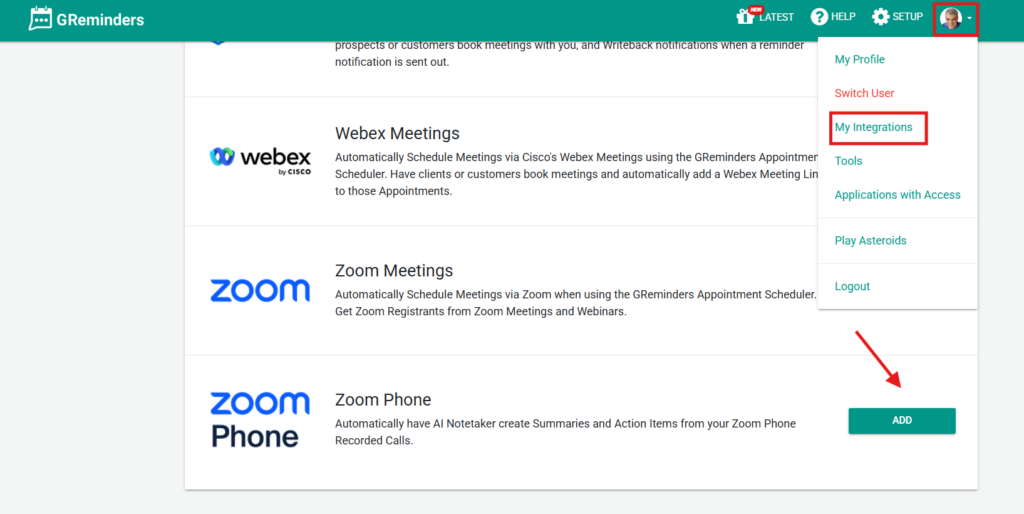
Connecting Zoom via My Integrations
To connect your Zoom account, click your profile photo or initials in the upper-right corner of GReminders. From the menu, select My Integrations. Any existing integrations will appear first. Next, click Available Integrations and select Zoom. You’ll be prompted to authorize the required permissions. Once completed, Zoom will be successfully connected to GReminders.
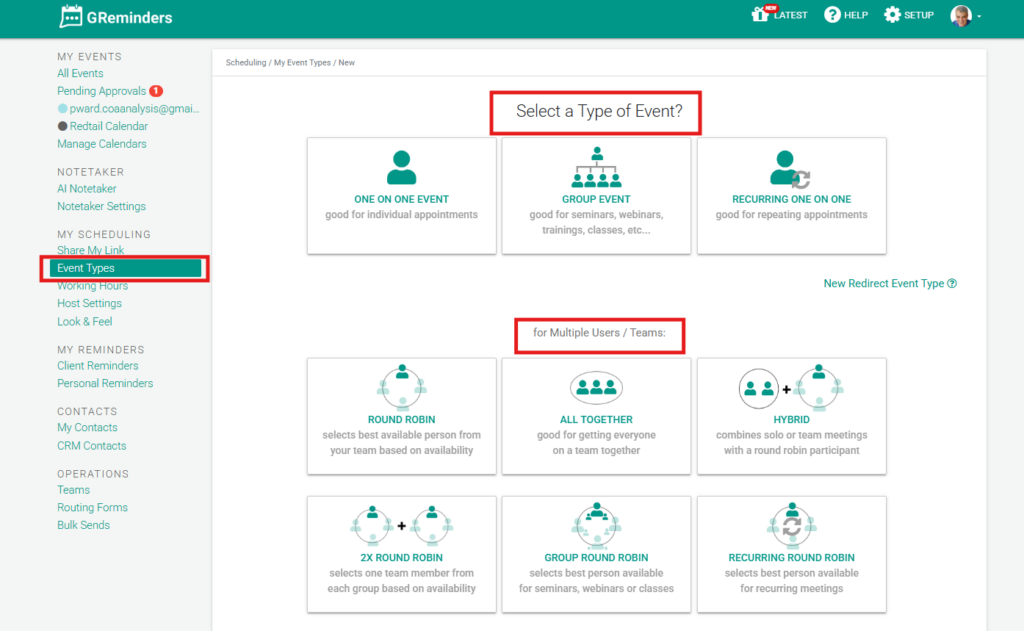
Creating Your First Event Type
Next, navigate to Event Types and click New Event Type. This is where you define what type of appointment clients can book. For example, if you are a financial advisor, you might name the event “Financial Review.” In the description, you could include text such as “An initial review of your financial goals.”

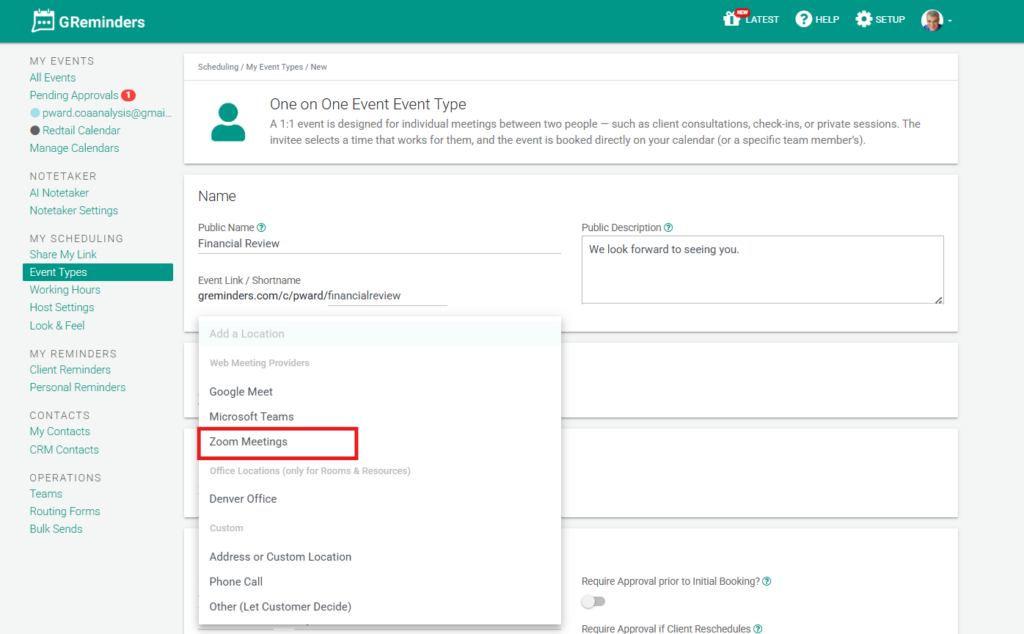
Selecting the Meeting Location (Zoom)
Under Location, use the dropdown menu to select Zoom. This menu also displays other supported web conferencing providers such as Google Meet, GoToMeeting, Webex, and more. If you’re interested in these alternatives, refer to our other videos.

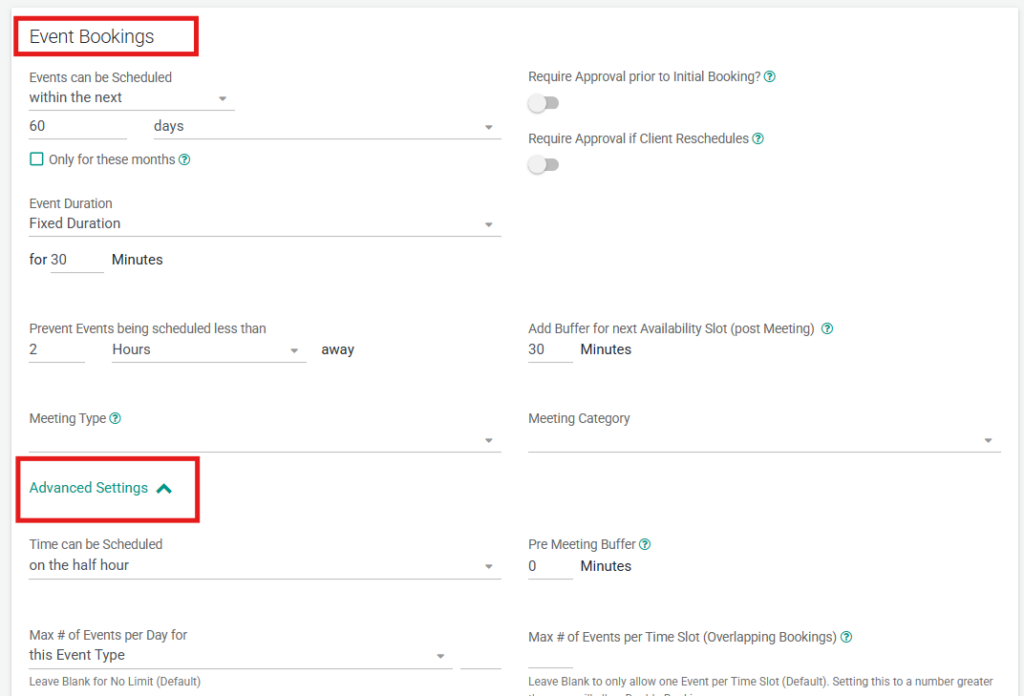
Event Type Booking Settings
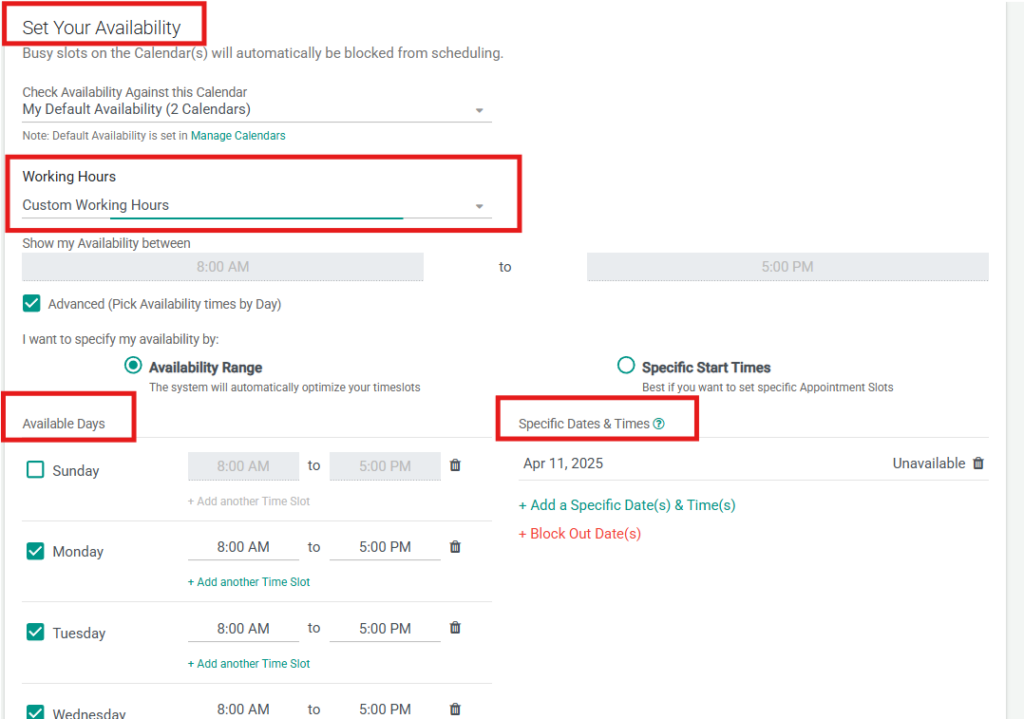
First, configure the settings that apply specifically to this event type. This includes selecting the event duration and determining how close to the meeting time a client is allowed to book. These options control how the appointment itself behaves when someone schedules it.
From here, you can further restrict availability for this event type by selecting specific days of the week and time ranges when clients are allowed to book. GReminders will automatically block any times where you already have existing appointments on your connected calendars, ensuring there are no double bookings.
Client Intake Fields and Event Title Customization
Next, define the information your client must provide to book the appointment, such as name, email address, and phone number. You can also customize the event title text, similar to GReminders templates, by cutting, pasting, or adding your own wording.

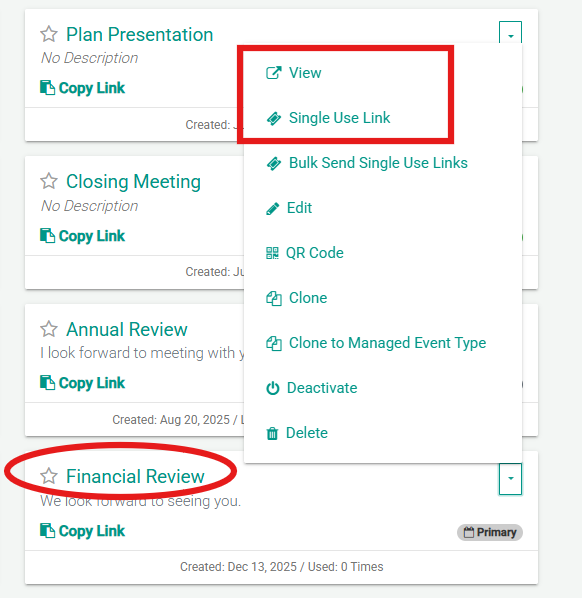
Creating and Sharing Your Booking Link
Click Create to finalize your event type. Once created, your personal booking link appears at the top of the screen. You can share this link in emails, add it to your email signature, or embed it on your website.
Client Booking Experience
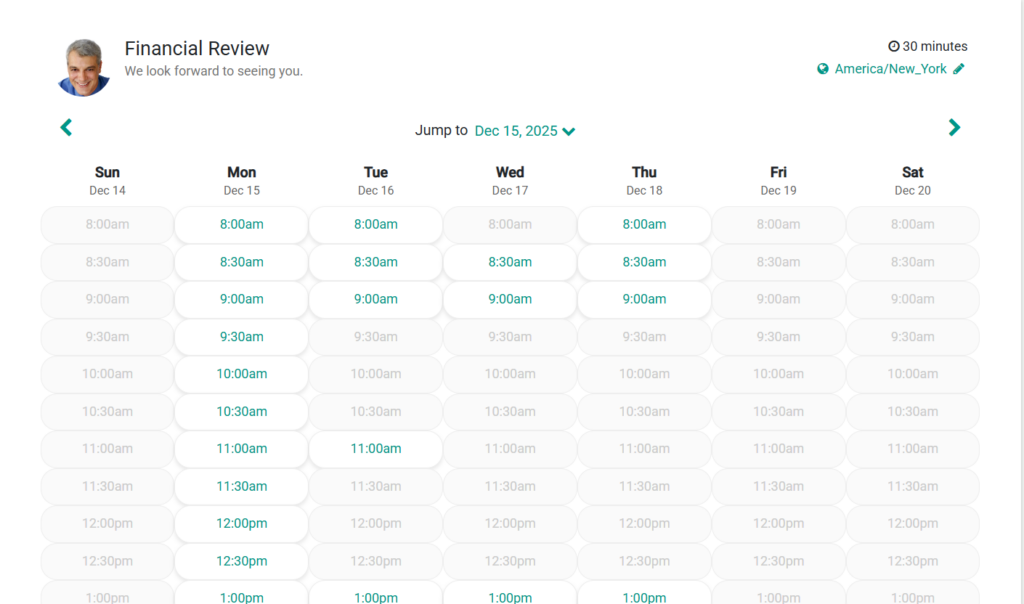
When a client opens this booking link for this event type, they will see your availability for this specific event. The client selects an available time, enters their information, and can choose whether the system remembers them for future bookings. Clicking Schedule completes the booking.
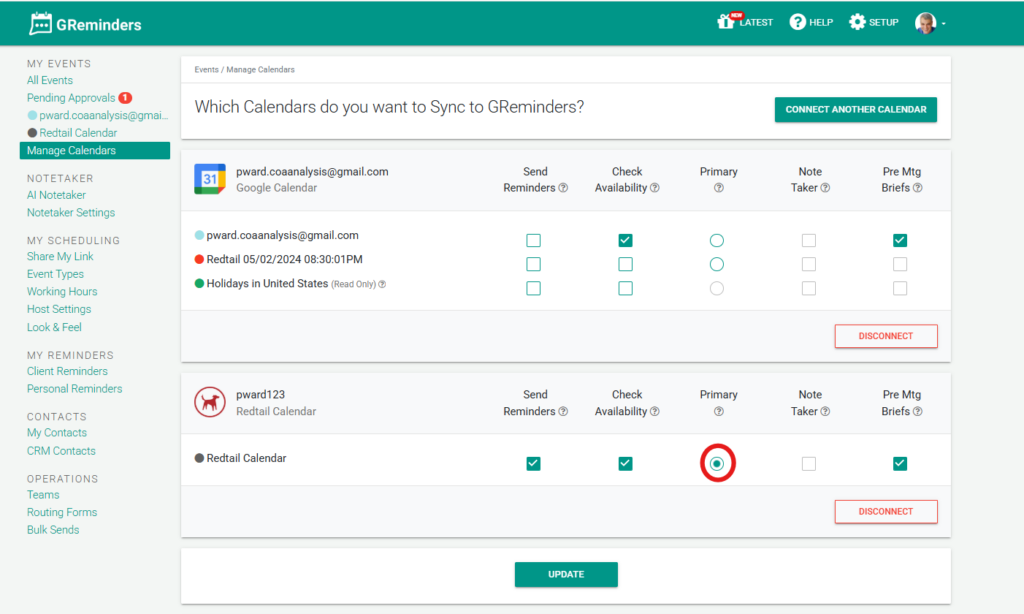
Calendar Selection and Availability Checks
If you have multiple calendars connected to GReminders, choose which calendar should receive bookings for this event type. You can also select which calendars are checked for availability—either one specific calendar or all connected calendars.
Conclusion
You’ve successfully connected Zoom, created an event type, and enabled clients to book meetings directly on your calendar through GReminders. This streamlined process saves time for both you and your clients.
FAQs
How do I connect my Zoom account to GReminders?
To connect your Zoom account, click your profile photo or initials in the upper-right corner of GReminders, select 'My Integrations' from the menu, then click 'Available Integrations' and choose Zoom. You will be prompted to authorize the required permissions, and once completed, Zoom will be connected to GReminders.
How can I create a new event type for clients to book appointments?
Navigate to 'Event Types' in GReminders and click 'New Event Type.' Define the appointment type by naming it and adding a description. Select Zoom as the meeting location, configure booking settings such as duration and booking lead time, specify client intake fields, customize the event title, and then click 'Create' to finalize the event type.
How do clients book a Zoom meeting using GReminders?
Clients receive a personal booking link that you can share via email, email signature, or embed on your website. When clients open the link, they see your availability for the specific event type, select an available time, enter their information, and click 'Schedule' to complete the booking. The meeting is then automatically added to your calendar.